Rise of the tomb passage of additional tombs. The scientific station and the rescue of Ion. Test - rabbits and barrels
Here is a complete walkthrough of the game Rise of the Tomb Raider, which is divided by location.
Top of the Mountain
This is a training mission. So follow the instructions. The only difficulty that may arise here is triggers that work poorly. When climbing up and jumping towards the rescue hand, make sure you get to the maximum height available and move as far to the left as possible, otherwise the trigger will not work. Same thing when swinging on a cable later - jump only with maximum amplitude. No other problems are expected here.
Syria
You need to find the grave of the prophet. Climb up until you find a gap in the wall. On the right, take the treasure and roll inside. Inside you will find a large room with a pillar in the middle. You can't read it because you don't know Greek (surprise), but if you study the fresco on the left and the fresco on the right, your level will increase and you will be able to decipher the code. The treasure is nearby, take it and move on. Outside you need to get to the other side. Nothing too difficult, just remember to double jump in the middle of the stone bridge. When you reach the desired point, climb up and go inside. After the scene, you need to break the wall on the left with an ice pick. After the flow of water, go back, jump onto the resulting bridge and get over to the other side. In the next room, you need to go around the massive building right in front of you, and climb up the other side, past the spike trap and jump to the other side to the entrance to the next puzzle. This is where things get a little more complicated. When you step on the boards, water comes and washes you down. You need to shoot down the board and, without waiting for it, jump to the other side. There, right in front of you, use an ice ax to break the cracks in the wall. The water level will rise, and you can jump on the board again and wait until you are washed away. It will wash you right in front of a floating raft, which you need to quickly climb onto, jump onto the wall and climb onto the beam. After the video, run to the exit, shooting back from the Trinity bandits.
Siberian Wilderness
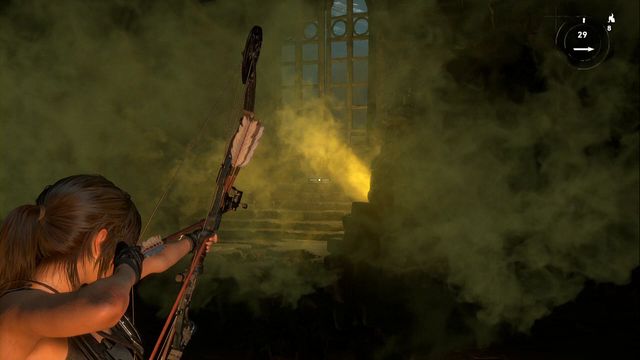
Go down and collect resources near the abandoned camp using the stick to highlight the necessary items. Return to the campfire and make a bow. Having upgraded everything you can, go forward to the mark and collect resources along the way. After a series of QTEs, you have to run away and press buttons again. As a result, Lara is injured and needs medicinal herbs. Having collected everything you need and recovered, you have a new task - to make a poisoned arrow against a bear. For this you will need mushrooms, fabric and trees. Collect everything you can on the way back to the camp, at the same time looking into the cave on the right, where there is a scroll and explosive ore in the walls. Also, climb the illuminated trees so you can find more scrolls and hidden resources. At the campfire in the camp, make poisoned arrows, upgrade your bow, the skills you need (I recommend thick skin and quiet jump) and return to the bear. But not everything is so simple - detachments have set out to search for you. The easiest way is to destroy all enemies one by one with a bow (don't forget to shoot arrows with the right trigger). At the central point, take the canister and explode it with an arrow in the cave nearby - this will open the way to the treasure. Using the map as a guide, find the prince's crown and examine it. This way you will gain the Mongolian language skill and be able to decipher the pillars nearby. Collect the newly discovered treasures on the map and go to the bear. The easiest way to destroy a predator is to sneak into the cave and poison it with a shot of a poisoned arrow, and finish it off with two accurate shots to the head. If you miss, use poison again and deal damage with regular arrows. If you miss here too, run back to the edge. The bear won't follow you, and you can regain your strength and create new poison arrows with the right bumper. After defeating the bear, take its skin, collect all the items in the room and use an ice ax to break a passage into the ice cave.
Ice cave
Go down and the climb on the right will help you collect another scroll. Continue along the road and you will come to the second camp, which needs to be activated. Remember that you can move freely between camps and if you forgot something, you can always clean up the treasures later. Upgrade your ice ax and distribute your skills and move forward. As soon as you see the giant ship hanging over the cliffs, stop walking along the ledge and head along the mast to the first optional task.
Ice Ship(Tomb of Trials)
The puzzle is not difficult - you need to knock down the ice and climb up. To do this, launch the mechanism with an ice ax, double jump up the mast and jump over to the right pendulum. Wait until he goes down, get off and climb up the wall cleared of ice. Again the mechanism. Twist the stick until the left pendulum lowers to an acceptable height for jumping. Walk along the mast and jump onto the pendulum to break the ice here too. Descend and climb the ice wall using ice axes. A ton of treasure awaits you, including a holy book that improves your archery skill, a second level of Greek, and a ton of gold. Having collected everything, go down the cable car and pick up a medallion next to the descent, which, after examination, will reveal an important secret to you. You can continue the story mission. Upon leaving the cave and after swimming in the water, do not forget to pick up the scroll on the right.
Soviet base
Now you need to get to the Soviet Base and this is not at all easy. First, go down and examine the opening on the right. It leads to a cave with treasure and a fragment of an ancient bow. There are no riddles there - it’s enough to navigate the labyrinth well, especially since it’s circular. Once you pick up the artifact, return to the starting point. There is a new element here - kerosene lamps and crowds of enemies. Throw a lamp into the crowd and the enemies will light up. Finish off the rest with a bow. Further up the path with weak resistance and the interrogation room, where you will find the first pistol. In the hangar, destroy all enemies with a bow, or distracting with bottles and climbing up, pick up a kerosene lamp and set fire to the tank. A drawing on the wall will help you improve your Russian language skills. Move on. This is your first side quest. If you destroy all the transmitters on the map, you will not only receive a lot of experience points and loyalty, but also a master key that will open several important chests and cabinets in the level and allow you to collect a second pistol. Note that when destroying the transmitters, one is located above the cave with the wolves. You can get to it only by climbing the steep surface to the right of the cave and then spiraling upward. The rest of the transmitters are no problem. Near the rise to the plot point there is a factory building. At the top is a relic, next to it is the same cave with the wolves, and a little to the left, covered with boards, is a secret cave with another useful skill. In order to break the boards, shoot the rope and a block of stone will open a passage for you. Go downstairs.
Cistern in the Cave (Tomb of Trials)
You can immediately run towards the relic, but the boards will break off and you will fall into the water. If you go to the lower right corner, you will find a passage to a hatch and a canister. Blow up the canister and add some water. Now go back around the structure and you will find three canisters on the right. You have a difficult trick ahead of you. You need to take the canister and throw it on the raft. Then jump onto the beam and drive the raft with the canister to the other side with water. Jump off and wait for the raft with the canister to float next to the hatch. Blow up the canister and a new passage will open. Inside you need to climb up and break the wall. Jump down. Throw the canister back onto the raft and repeat the trick with the lever. Now you need to have time to swim to the raft and throw the canister into the broken window. Go all the way back, take the canister and blow up the last hatch inside. The water will reach its limit and you will be able to take away the skill. Head back to the Soviet base. You can explore the wolf caves, but there's nothing special there. The cave in front of the story marker will open up another dungeon for you. You can go in and complete the task in the dark. Return to the last bonfire, destroy all the enemies at another camp. Enter the back ones and discover a merchant who is ready to exchange valuable items for gold coins. Higher up and down. Enjoy the plot twist.
Jailbreak
Break off the pipe and break down the wall. Pick up a new bow upgrade on the table - cable. Break down the beam above the door with a cable and get out. Hack the box with a master key and go outside. Here you need to strangle all the enemies in the level one by one. Start on the right, tower and slowly choke them one by one. Then destroy all the laptops to complete the side task and shoot the cable to make your way to the window. Another video. Get out and go forward. Attach the rope to the cable and then to the winch and get rid of electricity in the water. Get a machine gun. Forward again. You will be presented with a grenade with shrapnel, which can be made from a tin can. Don’t refuse, and when you’ve dealt with all the enemies, run outside. You have a new battle ahead of you with several armored opponents - use cans of bolts. After winning, you will have several runs against the clock, plus you must swim underwater - do not forget to quickly press B to speed up. Run again and finally you will come to your senses in a new place.
Finding Jacob
Before you go looking for Yakov, return to the cave in front of the camp. Kill the snow leopard by spending a lot of bullets or arrows on it and then break the boards in the cave and save in the camp. Don't forget to upgrade your skills and in particular the advanced campfire crafting in the survival section, which will give you the ability to large quivers, ammo bags, etc. Do everything you can and move on to the Tomb of Trials.
Voice of God (Tomb of Trials)
You need to go forward and only be afraid of the second collapsing ice beam - have time to jump in time and grab the wall. On the other side, shoot at the post and tie the rope. Now you need to go inside the tomb. There will be a map, a note and some gold. The far counterweight is stuck so you can't lift the second gate. Lower the first ones. Climb up them and get over to the other side. Jump down to the right and attach one end of the rope to the counterweight and the other to the reel. Pull the rope as tight as possible and remove the bolt on the right. If you did it correctly, the coil will no longer be active. Go back and break through the wall to the other side. Raise the gate again and you can secure the counterweight in position. Go back to the lever and pull it to the maximum and then cut the rope on the right. The ice is destroyed - you can raise the gate and take away another useful skill. This will restore your health in battle in case of critical damage. Go back using arrows and cables to the base camp. You can return to the Wilderness Hideout and open the previously inaccessible cave with an arrow and rope and return to Jacob's slips.
In search of Jacob. Part 2
On the way to the goal, you will meet a wounded descendant. He will ask you to clear the cave of wolves. Yes, the same one that you have already cleaned twice from wolves and a leopard. Use poisoned arrows against the animals and they will die very quickly. As a reward, you will receive upgrades for your pistol and gratitude. Near the lumberjack camp, you can receive another optional task to get out of prison. The easiest way to reach the prisoners is through the river and using a rope to climb up. The prisoners are next to the air duct below, the geographer's backpack is on the left. And next to it is another short cut that will take you to the interrogation room. Upon completion of the task you will receive another skill. There is one more optional task left from the wounded man in the cave. There you need to explore the enemy base or another one near the lumberjack camp and look for a crow. The missions are not difficult and there is no point in describing them. They will give you an important skill and components for weapons. Continue the main mission along the markers. Collect all documents and artifacts, read the frescoes. Once you receive the Molotov cocktail you are almost there. To the right of the main building you will find another optional tomb - the Uranium Mines.
Uranium Mines (Tomb of Trials)
You need to go lower and lower, fall into the water and go around all the forks. During the jump, the structure will fall apart. That's how it should be. Along the way, you will come across a pipe with water covering a flammable structure - just throw the incendiary mixture over the top. Next, a puzzle awaits you. You need to jump onto the far counterweight and break the paths. Rise higher and shoot an arrow with a rope at the mechanism, thus pulling out the trolley. Then jump over the pin in the wall to the other side and go up. Near the pillar, shoot an arrow with a cable at the trolley. Go down, jump on the counterweight, and the trolley will close the water source. Throw an incendiary mixture at the opened flammable barrier. Jump inside and pick up the Keen Eyes skill - it gives you the ability to see traps. Go back.
In search of Jacob. Part 3
Burn the obstacle on the way and go forward until you hear voices. Explode gas pipes over the heads of enemies and throw them with an incendiary mixture. Eventually, you will reach a point where you need to stretch the rope and slide down through another rope. Get ready to run. Upon completion of the videos, you will find yourself in a new location.
Abandoned mines
Kill three enemies and call the elevator. Adjust the cart and climb on it to get another new item - a knife. Cut the cable for them. Get to the other side and eliminate two more cables that hold the elevator. Climb to the very top and go forward to the fire. Upgrade your skills, weapons and bow if you have collected all the artifacts along the way. Examine the fresco and gain level 4 Greek proficiency. In the next room, destroy all the enemies either by attracting them with a bow shot and finishing them off with a cocktail, or simply in hand-to-hand combat with an ice ax if you have upgraded it. Works flawlessly even on maximum difficulty. Collect all the artifacts and notes and move on. There is a door in front of you that is difficult to open. Go down the cable to the right. Attach the trolley to the cable and pull it to the top. Cut the cable. And one of the locks will be torn down. Go around the structure and in the dungeons, jumping over the pit, you will rise to the top. Destroy all enemies with explosives. First of all, with the shield and then blow up the barrel at the top. Now go upstairs and go to the crane. There is a winch on the other side - attach it to a large bucket. Move the trolley so that the bucket is above the water. Now run. Remember to jump right in front of the steps. And now you are inside. After a short video, explore everything and, after going through the underwater caves, you will find yourself in a new place.
Geothermal Valley
This is another large area with a lot of tasks, tombs and treasures. But you won’t be able to get most of it, since you don’t have oxygen for diving. Therefore, concentrate on exploring the area and completing side quests. For shooting drones you will be given a bow. Hunting boars and deer will bring experience points and equipment fragments. Once you complete all the tasks except the last one to inspect the tombs, follow the story. You need to light the torch on top, and by doing this you will receive a fire arrow. Go to the next story point and get a shotgun and a new enemy type - the flamethrower. Run in circles and shoot bullets at him. After killing him, move on. Everything is destroyed and you need to go get the atlas. Along the way, you will come across a tomb of trials on the right - a water-bearing cave.
Aquifer Cave (Tomb of Trials)
Pull the rope and get over to the other side. Go around the graves on the right and get to the top. The base camp awaits you there. The next puzzle requires dexterity. You need to hook the boat to the mechanisms and have time to choose the next point. When you reach the island, collect everything and hook the rook first to one millstone and then immediately to the second. Use the lever to pull up. And you will reach dry land. Inside the tomb, the skill of hitting animals in the heart. Useless garbage, as it does not work against leopards and bears. Get back on the route.
Acropolis
Not far from the dungeon there is a new location - the Acropolis. Follow the story. Everything is not so complicated here. When you receive an explosive arrow, blow up the door through the hole in the grate - the target will be highlighted. Then go to the tower. Inside there will be a meat grinder, at the end of which you will have a perimeter defense. Use poison and explosive arrows. Save some explosions for enemies with shields at the end. Upon completion, you will receive a new item - an ice ax on a rope, which you can use to cling to ledges and special objects in the air. And a new goal - a church with an atlas. Go to the goal, and leave all the tests for later. As soon as you find yourself in the swamp, go to the far right corner and shoot the armored guard on the left with an arrow. Then go around the area and detonate the gas canister, shoot at the barrels at the top and there will be two or three enemies left that you can easily finish off. If you don’t succeed right away, shoot the cluster with exploding arrows. The next group will be after the window. Kill three guards at once with an explosive arrow, and finish off the rest with a shotgun without leaving cover. The last group will consist of two near and several far away. Use a Molotov cocktail up close and an explosive arrow at a distance. Finish off the rest with an explosive arrow or machine gun. Next, go through a series of long jumps with an ice ax on a leash until you reach the entrance to the cathedral.
Flooded Archive
If you are stuck finding the entrance, then look at the upper beams at the very top and use the grapple. After a short scene, shoot two batteries with a pistol and enjoy the video. Activate the fire. You need to find the entrance to the archive. Everything is not very difficult - the atlas is nearby. Along the way you will receive an oxygen apparatus for a long stay under water. So that you can open the last four tombs - their description will be at the end of the guide. As soon as you receive it, enemies will begin to surround you. Use Molotov cocktails. They will try to open the door with an autogenous gun - wait until they enter and throw the second fire bottle. Now you need to get out of the Cathedral with the artifact. Blow up the barrels and the statue will tilt. Go left, swim underwater and blow up three enemies at one point. Go up to the right. You need to drag through the first amphora with fire. Release it and then blow it up with a fire arrow to clear the way. Get over to the other side and release the amphora again. Tie it to the pole with a rope and then, when it floats around the burning obstacles, cut the rope. When the amphora reaches the sculpture, explode it with a fire arrow. Now go in the opposite direction. Roll out the amphora and tie it to the lift. Pull the other end with the rope. Roll out another amphora and tie it again. Kick the amphora away. On the other side, cut the rope from the amphora and push it into the water. Wait for it to swim to the monument and blow it up. Now you just need to run to the exit. The ancients are very unhappy with you. Now you need to get to the Observatory. But we won’t rush there and will look into another tomb – Ketezhnye Baths.
Ketezhnye Baths (Tomb of Trials)
Swim underwater, then wait and run between the streams of water to the fire. Jump over the trap and crawl between the roots. There is a lot of water waiting for you below. You need to attach the boat to the beam on the left and then lift it to the edge. As soon as you climb up, run to the lever and drain the water. Secure the cable to the lever and winch. Wind up the winch. One water level has gone down. Go down and pull the boat to the right beam. Climb inside and drain the water on the right. Attach the lever to the boat with a cable. Now go down, blow up the barrels and take the manuscript. He will give you a climbing bonus. The cave has been completed. Return to the main route - you can simply teleport to the nearest camp. As soon as you get the steeplejack arrows, you can climb the mountain next to that very cave with the wolves. Walk forward until you reach the Trinity Research Station.
Science Station and Iona Rescue
You need to destroy all enemies on the way. The easiest way is to use an incendiary mixture against groups and finish off those remaining from around the corner. Repeat this tactic several times and if you want, blow up all the cars with fuel. When you are forced to defend the camp and find yourself under the ice, first swim out the first window and quietly remove the enemy. Then swim to the far left window and from there destroy all the enemies you can with poison. Swim through the far right window and get ashore. Use jars with explosives. When you destroy everyone, a great secret will be revealed to you, and you can try to enter the city.
Planetarium
Use the climbing walls until you reach the planetarium. This is not a difficult puzzle. You must turn the structure with arrows and ropes so that a bridge is formed. In fact, you have to line up the planets so that there is a bridge right from which you can use your cat to jump to the other side and then climb onto the washboard lattice surface. On the second tier, you need to remove the support on both sides, and the structure will rotate. You need to climb to the very top, so you jump on the cat to the center, jump onto the board, your main task is to hang on the structure with two beams and Lara herself will tell you when to jump from it. Then, with a running start, jump onto the center of the structure and climb up. You quickly run along the beam to the exit. You have gained the skill and passed the test. The path of the immortals awaits you.
Path of the Immortals
Just move forward, hiding from the immortals and enjoying the city. When you climb up, it will become clear that they are not immortal and you have to fight. Save in the camps. Use shotgun, melee and jugs during the battle. They explode great. After a short scene, everything will be in flames. Shoot with explosives, blow up the pots and go upstairs - it will be safe there. Once you are done with everyone, go forward and after a short scene you will find yourself in the Lost City, where the last tomb awaits you.
Lost City
If you go forward and swim underwater, you will find yourself in a crypt with a valuable item, and if you go back and enter the cave on the left on the map, you will not only meet a bear that can easily be killed with explosives or poison arrows, but you will also unlock tomb of trials.
Chamber of Exile (Tomb of Trials)
After defeating the bear, break the wall and move forward. Use a fire arrow to blow up the gas passage. You need to turn two levers with a rope while at the bottom and then run to the cage with the skeleton and cut the chain. Explode or wait for the gas to dissipate. Now lift the cage using the mechanism at the base of the crane. Turn the cage towards the gate. Climb up, release the gas from two levers and explode with a fire arrow. You will receive a bonus to fire damage. Return to the main route.
Lost City. Part 2
You need to get into the city, but the gates are in the way. Use the trebuchet. As soon as you get inside the first gate, a circular battle awaits you. Use a rifle - it is most effective and has exploding arrows in close combat. When the enemy is finished, go to the second trebuchet. As soon as you deal with the enemy, turn the beam with a cable and cross it to the other side. Attach a bucket. Turn the structure and close the bottom of the bucket with a cable. Bring the bucket to the water. Then rotate the bucket so that the counterweight is opposite the ice. Drain the water from the bucket by opening the latch with a cable. But not completely. Close the bottom again with the cable. Jump onto the counterweight and the ice will be broken. Shoot at the second gate. Your trebuchet will be destroyed and you will have to go to another one. Destroy the enemy there. Attach the rope to the boards and fastening. Release the propelling mechanism and turn the trebuchet. Archers will attack - cover them with fire from the trebuchet. Now break down the gate and go inside. After the cutscene, you need to climb the tower. In the end, you will get to the tower and an enemy will hang on you - shoot off his helmet with a pistol shot and then shoot him in the head until he falls. Rise higher. After the video, the boss is waiting for you - a helicopter. Use the "X" digger when you're ready and shoot the fire projectile from the trebuchet when it's above the helicopter. You need to repeat this three times and each time everything will be interrupted by waves of enemies. Use poison arrows against your enemy - they are the most effective. After destroying the helicopter, you will have to fight another boss. Your weapons will be taken away, so make bombs from cans and throw them at the enemy. When he is stunned, hit him with an ice pick. At the end you need to dodge “B” and counterattack “Y” in time. Kill the wounded enemy or go up to the Chamber of Souls.
Chamber of Souls
Enter the temple and enjoy the ending. Congratulations, you have completed Rise of the Tomb Raider.
Below are the remaining two dungeons out of the nine that I promised earlier:
Chamber of the Suffering (Tomb of Trials)
In the geothermal valley, you need to go to the lowest corner to the waterfall. Use a rope to jump to the other side, crawl under the gate and defeat the pack of wolves. After breaking the grate, you will find yourself in a cave with a tomb of trials. The puzzle is difficult at first glance. Roll the spool of rope all the way forward. On the right, attach the figure eight to the beam and go to the opposite corner with the bucket. Pull the rope and the bucket will drop down. Tie him to the reel cart and the puzzle is solved. Climb up the steps to the left of the entrance and run to the next secret with the skill - quick healing. Return to the valley for the second tomb.
Pit of Redemption (Tomb of Trials)
This is the last of the challenge tombs and one of the easiest. Once in the cave, you must go down into the water and follow the right railway, since the left one is blocked. Having gone up, roll the cart forward and turn the platform with three wooden fences forward. Push the cart down. There is a pillar to your right - tie a cable to it and move to the other platform on the other side. Climb to the very top and use the lever to lower the lifting platform down. Turn the mechanism with three paws and roll the cart onto the moving platform. Now turn the platform so that it is on the opposite side from you. Lift the platform up and push the cart down. Another secret and useless skill of a geologist has been revealed to you. Congratulations, you have completed the entire tomb, received an achievement and can complete the last task from your descendants.
Side quests
Tomb
Monoliths, Archivist's Maps, Geographer's Backpacks
The map represents the location of all the collectibles you can find. The numbers provided by the marking serve as a link to the description with screenshots. Collecting all items and completing all mission objectives allows you to explore the location to 100%.
Geothermal Valley one more (after Soviet base) large location. Here you will find many hidden collectibles. To improve the perception of this large map, we divided it into several “layers”. If you have any difficulties finding any item or passing a test, then also look at the section at the very bottom of this guide.
Relics

Relics
Descriptions with screenshots
Relic 1

In the grotto, behind the boards. Examine the bottom of the artifact.
Relic 2

In a tent.
Relic 3

Head down a bit from the Valley Farmstead base camp and head towards the edge of the map. There you will find a barricaded entrance and a chest with a relic inside.
Relic 4

In a stone building.
Relic 5

On the stairs, in the very corner.
Relic 6

Inside the Pit of Atonement tomb, on the platform to your right, after you swim through the reservoir and face it, (go up the train tracks).
Relic 7

Inside the Pit of Atonement tomb, near the second cart. Examine the "six" on the dice.
Relic 8

In the camp cave, in the “Kitezh Baths” tomb. Inspect the strap attached to the case.
Relic 9

At the statue.
Relic 10

Right after you enter the tomb (the moment before you enter the camp).
Relic 11

After you enter the courtyard, run to the second gate opposite the entrance.
Relic 12

In the cave leading to the Catacombs of the Tomb of the Sacred Waters. Right after you enter the circular cave. The relic is against the wall, between piles of skulls.
Relic 13

In the same cave as the book.
Documents 1–15

Documents
Descriptions with screenshots
Document 1

After you leave the Acropolis, you can go down the cable. From where you jump off the rope, climb up a little.
Document 2

Climb down the base camp cable (Riverside Landing). Walk around the small wooden house and you will find a document against the side wall.
Document 3

Inside a small house.
Document 4

In a wooden house.
Document 5

The hangar is swarming with enemies (ground floor) when you complete the story quest on the way to the cathedral.
Document 6

The document is on a box near the wall.
Document 7

While climbing towards the cathedral, right past a tower with one enemy. At the door.
Document 8

On a table in a wooden house.
Document 9

Inside a tall building.
Document 10

On a wooden platform next to a tall building.
Document 11

On the table in the house.
Document 12

On a box under a canopy.
Document 13

On a ledge that you can reach is above a tree that you can shoot broadhead arrows at. Follow the arrows up the tree and jump over to the ledge.
Document 14

Along your path, in the cave. Past the wall, go left at the first fork.
Document 15

In the next cave.
Documents 16–33
Descriptions with screenshots
Document 16

On a platform between the trees.
Document 17

In a wooden hut.
Document 18

In the cave, in the recess on the left, not far from the place where Lara goes down the cable.
Document 19

On a box under a wooden roof.
Document 20

On the table.
Document 21

Inside the small grotto that you will find next to the previous document. You need to set fire to the boards along the way.
Document 22

Inside the house.
Document 23

On the chest is a balcony of a large hangar.
Document 24

On a pillar that you reach by jumping from a nearby tree.
Document 25

In the tomb on the platform to your right. After you cross the reservoir, face it (climb up the rocks). The document lies on the ground, behind the cart.
Document 26

In the Pit of Redemption tomb, in the last cave where the book is.
Document 27

On a platform on a tree.
Document 28

In the tomb "Kitezh Baths". After you go up the stairs, go right.
Document 29

At the statue in the unlocked corridor, after you drain the water from the Kitezh Baths tomb.
Document 30

In the camp, in the “Chamber of the Suffering” tomb.
Document 31

In the "Chamber of the Suffering" tomb, after you reach the higher level, before the entrance to the cave where you read the book.
Document 32

In the “Chamber of the Afflicted” tomb, go down to the reservoir. The document is behind the boat on the right.
Document 33

On the island in the tomb “Catacombs of the Sacred Waters”.
Frescoes

Descriptions with screenshots
Fresco 1

You will find it on the river bank, on a column to the right of the waterfall.
Fresco 2

In the cave corridor. After passing the wall a little, go right and jump down (at the first fork).
Fresco 3

In the cave on the wall, after you go down the cable.
Fresco 4

On the stone wall, in the place where you can get the mission.
Emergency caches

Emergency caches
Descriptions with screenshots
Emergency cache 1

Move a little away from the main path and find a cache near a tree.
Emergency cache 2

By a tree near the rocks.
Emergency cache 3

On the cliff, right next to the waterfall, walk along the water from Ridgeline Campground.
Emergency cache 4

Near the rocks, opposite the passage to the Sunken Archives.
Emergency cache 5

In the forest, near a rock, not far from the hunting platform.
Emergency cache 6

In the middle of the path, at the level with the forest scattered in the river.
Emergency cache 7

On the ledge to the right of the cave entrance. You can climb up the wall.
Emergency cache 8

Emergency cache 9

In the bushes in front of the rock.
Emergency cache 10

By the fallen tree to the right of the cave entrance.
Emergency cache 11

Between the rock and the trees.
Emergency cache 12

By the rock, behind the pumpkin field.
Emergency cache 13

Emergency cache 14

There is a wooden house under the rock in front of the chest.
Emergency cache 15

During the passage through the cave to the Pit of Atonement tomb. The cache is located in front of the entrance, right behind the fallen tree that Lara climbs up.
Emergency cache 16

After you fall into the Pit of Redemption tomb, swim across to the other side. You find a cache under the wooden scaffolding, in the left corner.
Emergency cache 17

At the location of the second cart ("Redemption Pit"), climb to the top of the scaffolding and you will find a cache against the wall.
Emergency cache 18

In the "Chamber of the Afflicted" tomb, before you get to the camp. At the point where you reach the bottom of the ravine, before entering the corridor to the camp, jump from the stairs to the platform. The cache is in the corner, next to the large stone well.
Emergency cache 19

In the Chamber of the Suffering tomb, after you enter the courtyard, go right and find a cache in the corner, under the wooden stairs.
Emergency cache 20

You will find it in the "Chamber of the Afflicted" tomb. Immediately after you enter the courtyard, enter the reservoir on the right. You can dive and swim underwater into a new cave. Here you will find a geographer's backpack and a cache right next to it.
Fireproof boxes and caches with coins

Descriptions with screenshots
Treasure 1 (Ancient Bow Element)

To enter the tomb, go to the waterfall, climb a little below the camp (Ridgeline). You can jump over to the ledge on the other side (screenshot). Then, lower yourself twice onto the ledges below. Finally, make two jumps to the waterfall and cling to the rock. The entrance is behind the waterfall.

Treasure 2 (Quiver)

The entrance is close to the water, on the edge of the map. In the cave, break the wall and continue down. A little ahead, at the fork (after you go down), go left - the sarcophagus is at the end of the corridor.
Fireproof Box 1 (Semi-Automatic Pistol Element)

Immediately after entering this area, after the cutscene, you will find a chest directly in front of Lara.
Fireproof Box 2 (Composite Bow Element)

During the main storyline, you will find him on your way to the tower, after defending the valley, before the destroyed bridge.
Fireproof Box 3 (Semi-Automatic Pistol Element)

After you leave the Acropolis, near the camp.
Fireproof Box 4 (Composition Bow Element)

From the camp (Riverside Landing) down the cable. Then use explosives or shoot the barricade and you will find a chest inside.
Fireproof Box 5 (Shotgun Element)

Inside a tall building. To open it, you will need a master key.
Fireproof Box 6 (Gun Element)

Hunting platform in the forest.
Fireproof Box 7 (Shotgun Element)

In the corner, in the ruins.
Fireproof Box 8 (Shotgun Element)

Near the rocks, next to a wooden building.
Coin stash 1

Behind a wooden house.
Coin stash 2

By a tree, along a path in the forest.
Coin stash 3

On the edge of the map, next to the hunting platform.
Coin stash 4

Between two houses.
Stash of coins 5

In the corner, by the rocks.
Coin stash 6

At the entrance gate of the tomb.
Coin stash 7

Near a fallen tree, in front of the cave entrance.
Coin stash 8

Near the cliff, a few steps from the wooden tower.
Coin stash 9

On the way from the camp (Ridgeline), approach the ledge - the chest is next to the platform from which you can jump into the water.
Test - chickens, springboards and targets

Tests
A. Bird in a cage (catch 5 chickens)

In the valley near the camp (Valley Farmstead) there are quite a few chickens (marked on map A) running around. Catch up with one of them and Lara may catch it. Catch 5 to complete the challenge. The chickens are in different places, and traveling between camps leads to their "rebirth".
B. Jumping from high altitude (make 4 dives)
To complete this task, you need to find platforms (springboards) for diving. Don't forget to press the button so that Lara takes the appropriate position in the air. A normal jump will not count. The jumps are marked on the map B1-B4. Also watch the video at the very bottom of this guide.

Springboard 1
Approach the edge, near the base camp (Ridgeline). There you will find a platform from which you can jump into the water.

Springboard 2
This springboard is located on a wooden structure adjacent to the house where you can receive an additional mission.

Springboard 3
Located on an island where a signal fire burns at the top of the tower. You need to get to the other side (use the rope) and go around the tower.

Springboard 4
This springboard is located in front of the tomb's entrance.
C. Bullseye (Hit the target 8 times)
This task involves finding targets hanging in different places and hitting them close to the center - the red circle. On the map the targets are marked C1-C8.

Goal 1
While at the well, look towards the high wall with the target attached to it. The target is hanging above one of the windows.

Goal 2
This target is attached to a wooden structure, right next to your ally and where you can start the mission.

Goal 3
Approach the edge, close to the base camp (Ridgeline) - the target is hanging on the tree ahead.

Goal 4
Near a tree that you can shoot wide-tipped arrows at. Follow the arrows to climb the tree and jump onto the ledge.

Goal 5
Attached to a passage along the rocks on the river bank.

Goal 6
Turn towards the gate to the camp. You see the target on the left, at the top.

Goal 7
This one is hard to notice. First, stand in an appropriate place, with trees in front of you. From the location shown in the screenshot, you can zoom in and find the target higher up among the trees.

Goal 8
This target hangs on a branch above the waterfall. You can either find it from below or standing in front of the tomb entrance (located behind the bushes, look for it behind a wooden post that you can attach a rope to).
Test - rabbits and barrels
Description of the tests with screenshots
D. Hanging in the Sun (Cut 6 rabbits hanging in the trees)
In this task you need to find the ropes on which the rabbits are hanging and cut them. The rabbits' locations are marked on map D1-D6.

Rabbit 1
Near the shelter by the road.

Rabbit 2
At the wooden structure, next to your ally and the place where you can start the mission.

Rabbit 3
Between two trees, not far from the bridge.

Rabbit 4
Hunting platform on the edge of the forest. Jump from the rocks to the ladder and you can cut the rope at the top.

Rabbit 5
The rope is attached to a wooden structure on a massive rock.

Rabbit 6
In the place where you go down the cable, at the top of the village.
E. Pumpkin Throwing (Hit 5 barrels)
This is one quick challenge because all the barrels are located close to each other. Go to the pumpkin patch (point E on the map). You need to pick up pumpkins and throw them into barrels next to the field. They are marked on the map E1-E5.

Barrel 1
Near the pumpkin patch, through the fence.

Barrel 2
To the right of the field. Throw between the stones.

Barrel 3
Even further to the right, next to the building.

Barrel 4
On the balcony of the building.

Barrel 5
Go around one of the buildings. The barrel is behind the fence.
Tomb "Kitezh Baths"
Watch the video guide of the passage of the Kitezh Baths tomb
Description of the passage of the tomb “Kitezh Baths”

The entrance to the tomb is at the bottom of the valley, and the entrance is through a cave that you will find in the ruined part of the forest. Immediately after entering, prepare for a bear attack. After you kill him, swim underwater.

On the other hand (screenshot), climb onto the root and follow it slowly to avoid water flowing out of the pipes. Water comes either simultaneously from the first and third pipes, or from the middle one. Wait at the middle pipe while it is inactive.

Immediately after this, you find yourself in a camp. Take the relic by the fire, and the other one in front, by the sculpture under the stairs. Go upstairs (there is a document in the hallway to your right) and go left to enter the main part of the tomb.

Jump off and swim to the boat. Climb into it and attach the rope to the beam below where you jumped. Go up to the center of the boat and turn right, where you will notice another beam. Attach the rope and get there, thanks to which you can jump on the wall right next to you and enter the next cave.

Get closer to the mechanism on the wall and pull it. This pumps the water out of the chamber and allows the rope to be attached to the turning wheel in the water. Then give the mechanism one more pull and you will quickly reach the turning wheel. While the water level is low, you can give it a turn, which leaves the mechanism in the appropriate position. Do this quickly before the chamber fills with water again.

Go back to the first cave (you can get there through the small window) and attach the boat to the beam you haven't used yet - it's opposite where you left the boat. Come to the end ( Archivist card on the platform) and dive to the place shown in the screenshot. On the other hand, take the mechanism and wait for the water to come out of the chamber. Finally, run the rope towards the boat. Return to the boat where you need to use the turning wheel to secure the rope in place. This will drain the water from the chamber. There are explosive barrels at the main gate - shoot them and read the book, and on the way back grab the document (from the statue in the corridor).
Reward: The ability “Iron Grit” (allows you to climb rocks and ice faster).
Tomb "Chamber of the Suffering"
Watch the video guide for walking through the tomb “Chamber of the Suffering”
Description of the passage of the tomb “Chamber of the Suffering”

You will find the entrance to the tomb after you leave the village towards the river and jump over some platforms. You will reach a gate that you need to bypass through a passage under the rock. Right after this, you will be attacked by several wolves, so prepare your weapons in advance (you can also find an emergency cache here).

Go inside and follow the corridor, squeezing between the stones. A little further ahead you will have a walk into the camp (Lara comments on the architecture; along the way you will pass by a relic, and you can also jump down before entering the passage and checking the emergency cache next to the well). There is also a document in the camp. Go into the courtyard through the passage opposite the fire.

On the other side, you can find a relic and an emergency cache under the stairs on the right (optional, enter the water, into the pool on the right, where you can dive and swim to the area where you will find a geographer's backpack and an emergency cache). Then go to the place in the left corner of the yard (screenshot). Jump down and connect the platform with the hanging element. Return to the courtyard and look for the cart on the right. Push the cart as far as possible.

While next to the cart, look up at the bucket hanging above. To the right of it you see a lever - shoot it and quickly approach the cart. The bucket will fill with water and drop for a moment. You need to fit into this time window and shoot towards the bucket to attach the rope. Act quickly because the bucket will return to its original position after a while.

Finally, go up the stairs and jump across the next platforms to reach the camera on the other side. There you will find the Archivist's book and map, as well as a document, next to the entrance.
Reward: Ability “Fast healer” (faster wound dressing).
Pit of Redemption Tomb
Watch the video guide for walking through the tomb “The Pit of Atonement”
Description of the passage of the tomb “Pit of Redemption”

To find the entrance to the tomb, start from the ruins camp and head north along the river. Walk under the rocks and in the distance you will notice the path to the cave. Inside, jump over to the next ledge and squeeze through the gap - this way you will find another camp.

Let's jump over to the other side. On the right, next to the stream, is the geographer's backpack. Go down and get ready to jump and stick the ice ax into the stone wall as Lara begins to slide down. A little ahead, walk along the fallen tree trunk (you will find a cache on the left). Follow the narrow corridor and jump to the other side - Lara falls here, right into the main part of the tomb.

Swim across to the other side (there is a cache in the corner on the left). Then go up to the platform on the right, above the rails (can be seen when you look at the reservoir). At the top, take the relic and document.

Turn the wheel to the left of the cart 180 degrees. In the recess on the right you can jump into a small cave where you will find the Archivist's Map. Finally, use the zipline next to the cart you threw down and head to the next one.

Behind the second cart, pick up the relic. Go up (the passage on the left, where there is another cache against the wall) and use the turning wheel to lower the platform to the bottom. Once there, turn the wheel to orient the rails towards the cart.

Push the cart onto the platform and switch the rails again so they face the elevator's turning wheel. Only take the cart elevator where you need to push the cart down. This will open the gate at the very bottom, through which you can enter the cave with the book (there you will also find Document).
Reward: Ability "Geologist" (you can get chromite ore).
Tomb "Catacombs of the Sacred Waters"
Watch the video guide of the passage of the tomb “Catacombs of the Sacred Waters”
Description of the passage of the tomb “Catacombs of the Sacred Waters”

The entrance to the tomb is opposite the Aqueduct Ruins camp, and you will find it after the Trinity attack on the valley. The path to the tomb is very simple. Jump onto the fallen tree trunk and jump over to the ledge. Once inside, continue walking, pass the waterfall and go down below. To the right you will find a narrow passage that Lara can squeeze through.

To the right after the passage, use the rope arrow to attach it to the pillar on the other side. Walk along the rope to the other side. In the round cave you will find a relic. At the relic you can climb up and follow the path to the camp.

Approach the pond (on the right, on the boat, there is a document). First of all, you need to get to the island. Approach the turning wheel, shoot a rope arrow towards the boat and jump into it after pulling it closer. Cut the rope and shoot an arrow towards the mechanism in front of the island. Once you get close, cut the rope and jump down onto the stone platform. On the island you will find some coins and a document.

While on the island, you can see another boat under the waterfall (screenshot), a little ahead. Shoot an arrow with a rope and attach it to the mechanism. Then jump into the boat as it passes you and cut the rope. While on the boat, you need to look for another mechanism on the other side and shoot another rope arrow at the right moment (otherwise you will collide with the rocks). When you manage to stop the boat, start turning the wheel to pull yourself towards the platform. Then you can jump out of the boat, up where there is a ladder and then a book. Along the way you will also find the Archivist's Map and a Relic.
Reward: Anatomical Knowledge ability (you can see the hearts of animals, and deal more damage when you hit them).
At this link you can find a good map of the Geothermal Valley location with all the collectibles. Descriptions (English) for the map with screenshots: .
Watch the video guide for the “Bird in a Cage” test
Watch the video guide for the “High Height Jumping” test
Watch the video guide for the “Bullseye” test
Watch the video guide for the “Hung in the Sun” challenge
Watch the video guide for the Pumpkin Throwing challenge
The puzzle is not difficult - you need to knock down the ice and climb up. To do this, launch the mechanism with an ice ax, double jump up the mast and jump over to the right pendulum. Wait until he goes down, get off and climb up the wall cleared of ice. Again the mechanism. Twist the stick until the left pendulum lowers to an acceptable height for jumping. Walk along the mast and jump onto the pendulum to break the ice here too. Descend and climb the ice wall using ice axes. A ton of treasure awaits you, including a holy book that improves your archery skill, a second level of Greek, and a ton of gold. Having collected everything, go down the cable car and pick up a medallion next to the descent, which, after examination, will reveal an important secret to you. You can continue the story mission. Upon leaving the cave and after swimming in the water, do not forget to pick up the scroll on the right.
Cistern in the Cave (Tomb of Trials)
You can immediately run towards the relic, but the boards will break off and you will fall into the water. If you go to the lower right corner, you will find a passage to a hatch and a canister. Blow up the canister and add some water. Now go back around the structure and you will find three canisters on the right. You have a difficult trick ahead of you. You need to take the canister and throw it on the raft. Then jump onto the beam and drive the raft with the canister to the other side with water. Jump off and wait for the raft with the canister to float next to the hatch. Blow up the canister and a new passage will open. Inside you need to climb up and break the wall. Jump down. Throw the canister back onto the raft and repeat the trick with the lever. Now you need to have time to swim to the raft and throw the canister into the broken window. Go all the way back, take the canister and blow up the last hatch inside. The water will reach its limit and you will be able to take away the skill. Head back to the Soviet base. You can explore the wolf caves, but there's nothing special there. The cave in front of the story marker will open up another dungeon for you. You can go in and complete the task in the dark. Return to the last bonfire, destroy all the enemies at another camp. Enter the back ones and discover a merchant who is ready to exchange valuable items for gold coins. Higher up and down. Enjoy the plot twist.
Voice of God (Tomb of Trials)
You need to go forward and only be afraid of the second collapsing ice beam - have time to jump in time and grab the wall. On the other side, shoot at the post and tie the rope. Now you need to go inside the tomb. There will be a map, a note and some gold. The far counterweight is stuck so you can't lift the second gate. Lower the first ones. Climb up them and get over to the other side. Jump down to the right and attach one end of the rope to the counterweight and the other to the reel. Pull the rope as tight as possible and remove the bolt on the right. If you did it correctly, the coil will no longer be active. Go back and break through the wall to the other side. Raise the gate again and you can secure the counterweight in position. Go back to the lever and pull it to the maximum and then cut the rope on the right. The ice is destroyed - you can raise the gate and take away another useful skill. This will restore your health in battle in case of critical damage. Go back using arrows and cables to the base camp. You can return to the Wilderness Hideout and open the previously inaccessible cave with an arrow and rope and return to Jacob's slips.
Uranium Mines (Tomb of Tests)
You need to go lower and lower, fall into the water and go around all the forks. During the jump, the structure will fall apart. That's how it should be. Along the way, you will come across a pipe with water covering a flammable structure - just throw the incendiary mixture over the top. Next, a puzzle awaits you. You need to jump onto the far counterweight and break the paths. Rise higher and shoot an arrow with a rope at the mechanism, thus pulling out the trolley. Then jump over the pin in the wall to the other side and go up. Near the pillar, shoot an arrow with a cable at the trolley. Go down, jump on the counterweight, and the trolley will close the water source. Throw an incendiary mixture at the opened flammable barrier. Jump inside and pick up the Keen Eyes skill - it gives you the ability to see traps. Go back.
Chamber of the Suffering (Tomb with Trials)
Go to the bottom corner of the map straight to the waterfall. You need to get over to the opposite side - the cable will help you with this. Then we crawl under the gate and kill several hostile animals. We break the grate and go into the cave, where the tomb is located. Here you have to solve a fairly simple puzzle. We roll out the reel with the cable to the very edge. Next, we attach a figure eight to the beam and go to the far corner with the bucket. We pull the rope to lower the bucket down. We tie the bucket to the cart on which the reel is located. That's it, a solution to the problem has been found. We go up the steps and take a new relic with the “Fast Healing” skill. Now you can return to the valley.
Aquifer Cave (Tomb with Challenges)
Drag the rope to the other side and walk along it. On the right you will need to go around the small graves and go up. Here you will see a temporary parking lot. To solve the puzzle you will need all your ingenuity and dexterity. You will need to hook the boat to the devices, and then quickly jump to the next point. After getting to the island, you will need to hook the rook from one millstone to another. You will have to pull the rope using a lever. After doing several similar exercises, you will still end up on land. There you will find a relic that will give Lara the ability to hit animals directly in the heart. Unfortunately, there is little benefit from it, since it does not work on bears and leopards. Now you can return to your main route.
Ketig Baths (Tomb of Trials)
Swim underwater, then wait and run between the streams of water to the fire. Jump over the trap and crawl between the roots. There is a lot of water waiting for you below. You need to attach the boat to the beam on the left and then lift it to the edge. As soon as you climb up, run to the lever and drain the water. Secure the cable to the lever and winch. Wind up the winch. One water level has gone down. Go down and pull the boat to the right beam. Climb inside and drain the water on the right. Attach the lever to the boat with a cable. Now go down, blow up the barrels and take the manuscript. He will give you a climbing bonus. The cave has been completed. Return to the main route - you can simply teleport to the nearest camp. As soon as you get the steeplejack arrows, you can climb the mountain next to that very cave with the wolves. Walk forward until you reach the Trinity Research Station.
Pit of Redemption (Tomb with Trials)
Now you have an oxygen apparatus, and therefore we advise you to return to the Geothermal Valley and find a cave there, where you need to swim underwater for a long time. Then we emerge and follow the railway located on the right. Somewhere nearby there will be a new tomb with a puzzle. We go upstairs and roll out the cart. Next, you need to turn the platform with wooden fences in the opposite direction. Order Lara to push the cart down.
Then find a small post to your right and tie a rope to it. She will help you move to the second platform. Get to the very top and use the lever to lower the platform down. Unfold the three-legged structure, and then move the cart onto the platform. Next, turn it so that it looks on the opposite side from Lara. Raise the platform and drop the cart again. This will give you access to a new relic, which will give you the skill of a geologist (unfortunately, there is little benefit from it). Now you can return to completing the main quest.
Chamber of Exile (Tomb of Trials)
Once you kill the clubfoot, start looking for a wall with cracks. Destroy it with an ice ax and move forward. Take the explosive arrow and use it to create a passage. You will find out exactly where you can make a hole through the gas pipe. Then rotate the two levers using the cable arrows. Run a short distance to the cage with the skeleton and cut the chain. Then wait for the gas to dissipate or simply explode. Now you can try to lift the cage using a crane. You need to turn it straight towards the gate. Next, climb up to the upper ledge again and release some gas by activating the two levers. Explode the gas by shooting a fire arrow at it. Take the relic that gives a bonus to fire damage and continue with the main story quest.
The 2013 Tomb Raider game was a reboot of the legendary series about Lara Croft, who is also known to everyone as Tomb Raider. In the nineties and zeros, everyone played third-person shooters full of incredible adventures with great pleasure and waited for the release of new parts until the series gradually faded away. However, there were developers who decided to restart the legendary series, talking about how Lara became such a fighting and invincible woman. And in the first game of the restart, you play as a timid and timid archaeological university student who goes on research. The project turned out to be so successful that the developers began creating the second part, which was called Rise of the Tomb Raider. You will have to further progress through the storyline as the main character, but the game attracts special attention. There are only nine of them, and they all offer special tests. It is not necessary to complete them, but an impressive reward awaits you in each of the tombs. So it is still recommended to pay special attention to what you can be offered in the game
Ice ship
The Ice Ship is the first challenge you'll encounter in Rise of the Tomb Raider. The tombs will differ thematically, and the setting in them will be different accordingly. In this case, you will be tested in a ship stuck in the ice. Your task here will be to climb to the very top, but to do this you will need to get rid of the ice that is blocking your path. Do not think that this is easy to do - of course, you are unlikely to have any difficulties understanding in what order what exactly needs to be done, but sleight of hand will come in handy in this case. When you find yourself on deck, you can read several diaries and journals, from which you will learn what happened to the ship. However, your goal is an ancient manuscript, with the help of which you will receive a skill called “Ancient Skills”. What does it give? With its help, you will be able to handle your bow more efficiently, shooting twice in a row without having to take out a second arrow from the quiver - this will be very useful to you in your further adventures in the game Rise of the Tomb Raider. The tombs, of course, don’t end there - there are still many challenges ahead.
Ancient cistern

Chamber of Exile
Well, the last tomb of trials is the “Chamber of Exile”. It is located where you will need to break the gate blocking the path to the manuscript. To do this, you will have to do a lot of tricky operations that will require not only your intelligence, but also your dexterity. Eventually you will be able to blow up the gate using the released flammable gas, and if you succeed, you will receive the Greek Fire skill. This means that your fire arrows and other fire attacks will deal much more damage to the enemy, and they will also be able to penetrate even a layer of armor due to the extremely high temperature of the fire. Are you wondering why there was no mention of how the Tomb of the Prophet is played in Rise of the Tomb Raider? The thing is that this is not a tomb of challenges, but a full-fledged game story level, which has nothing to do with this article.
For fully exploring all nine tombs in the game you get achievement/trophy Tomb Raider.
Below we'll take a closer look at how to fully explore the tomb. Chamber of Exile.
Trial: explore the tomb
Reward: ability “Greek Fire” (increases fire damage from arrows and Molotov cocktails)
Path to The Tomb of the Chamber of Exile goes through the cave, which is located on . Before entering it, equip yourself with the best and most powerful weapons, because on the way you will have to fight a bear.
After fighting the bear, break through the wall behind him and continue along the small path. Along the way, you will still come across relics and collectibles, so pick them up and move to the end of the path.

Then you will find yourself in an area where you have to dive to depth. But if you turn towards the rocks, you can pick up a backpack, a relic and explore the emergency cache. Now dive into the water, swim underwater among the stalactites and stalagmites, reach the camp. Then move to the right side, where the Archivist Map and Emergency Cache are located.
Continue forward and you will find yourself in front of a gas gate. Shoot at it with a fiery arrow, which will allow you to blow up the gate and get inside.
In the next room you can find two Documents and some puzzles. So…
Shoot an arrow with a rope towards (at them, in other words) two levers (wrapped with ropes) that are above ground level. This will lift the valve and allow gas into the room.

Levers for gas activation
Now very quickly jump down and run towards the cage, near which there is a small niche that is not yet completely filled with gas. Cut the chain and explode the gas or wait until it dissipates on its own.
The next task is to activate the mechanism near the crane, which will allow you to raise the cage.

Once again, let the gas into the room by shooting the levers and then shoot a fire arrow at it (the gas). The cage will explode, the gate will collapse and Lara will be able to continue on her way, read the book and gain the skill.
Tomb completed


