Technology project (Kinusaiga technique). Kinusaiga art - amazing silk mosaic
The Japanese are famous for their ability to elevate any activity to the rank of art. Origami, ikebana, kanzashi and many other types of creativity have followed this path. The same thing happened with the Kinusaiga technique: the desire to reuse the rather expensive fabric of an old kimono turned into the art of creating magnificent paintings and panels.
Although the idea itself has its analogues in many nations: for example, in Rus' old things were used for patchwork. By the way, Kinusaiga’s paintings are often called the “patchwork without a needle” technique - after all, these patches do not need to be sewn!
History of Kinusaiga technology
Kimono is a traditional Japanese garment that has been considered in Japan since the mid-19th century national costume" The Japanese still wear kimonos to this day! The kimono is made of natural silk and, of course, lasts a very long time. Old kimonos were never thrown away, but were used to create other, smaller things.
One way to use silk kimono fabric is to create Kinusaiga paintings.

Traditionally, Kinusaiga is created as follows. First, the artist makes a sketch of the drawing on paper. Then the finished sketch is transferred to a wooden board. Recesses are cut into the board, about 2 mm deep. An old silk kimono is cut into small pieces (allowances of only 1 mm), which are inserted into the cut grooves.
Landscapes most often become subjects for cinematic films.


People appear much less often in the picture - depicting faces is a rather complex process even for masters. And if they do appear, they are most often stylized.


The Kinusaiga technique has become widespread throughout the world. Although, of course, not expensive pieces of kimono are used for production, but ordinary fabrics. And instead of wooden planks, ordinary polystyrene foam is used.
How to make a painting using the Kinusaiga technique
Take one look at exactly how Kinusaiga’s paintings are created (the master class is simple and accessible) and you will fully understand the whole principle.
Prepare in advance:
- A piece of foam plastic at least 1 cm thick
- fabric (scraps) of suitable colors
When choosing fabric, remember: it should not stretch, should be quite thin, and the edges should not fray.
- scissors
- breadboard knife (stationery knife or scalpel)
- a tool for threading fabric into foam (a nail file or wooden stick from a manicure set)
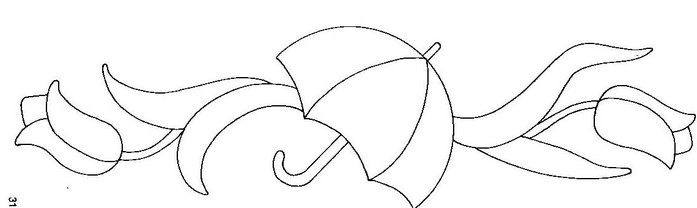
- drawing (you can draw it yourself, or you can use any children’s coloring book)
- carbon paper
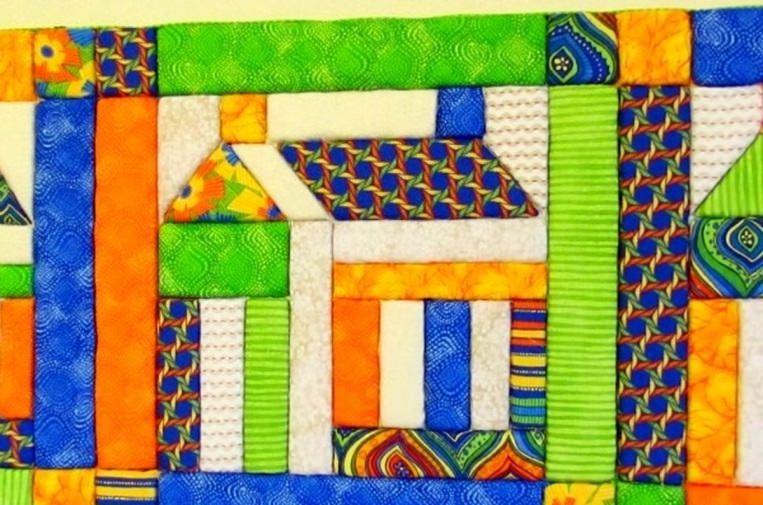
Choose the drawing you like. Let's take simple geometric shapes and make a house like this.


Using carbon paper, transfer the design onto a sheet of foam plastic.

Using a knife, we make slits along the contour of the pattern with a depth of approximately 2-3 mm.

Cut the fabric into suitable size shreds.

We tuck the shreds into the foam using a stick or file. Let's fill in the whole picture.

Cut off excess edges.

The finishing touch will be to frame the panel. As another design option, you can make a border using fabric or a wide ribbon attached to buttons.

Our picture is ready!

Very often, box lids are decorated using the Kinusaiga technique, resulting in beautiful boxes:


Needlewomen know. But many have only heard of what kinusaiga is. Unfamiliar magic word actually means the art of making paintings from silk scraps. A kind of patchwork, only without a needle. This type of needlework was born in Japan. At the origins of Kinusaiga was Setsu Maena, a professor at a Japanese university. Over time, kinusaiga spread beyond the borders of their homeland and European craftswomen immediately adopted this technique of creating beauty with their own hands. How can you pass up creating amazing things from scraps and remnants of silk fabric? Simply put, European needlewomen acquired the art of creating masterpieces while saving on expensive materials.
At the origins of Kinusaiga was Setsu Maena, a professor at a Japanese university.
Kinusaiga or patchwork without a needle: details about the technique and tools that are needed
The kinusaiga technique does not involve the use of a needle as in the patchwork technique, but is based on making a sketch on paper, which is then transferred to a wooden board.
A slot is made along the contour of the sketch - a recess. After that, the picture itself is made using scraps of silk. The Japanese women took these pieces of silk from old kimonos, which the thrifty Japanese never threw away - silk, after all.
The shreds are laid out on the cut elements of the sketch and the edges of the shreds are pressed into these same slots. With the right selection of paints and colors, the paintings turn out to be of unique beauty. And it would seem - scraps of an old kimono! We can say that the natural economy of the Japanese became the parent of this art - kinusaiga.
Gallery: kinusaiga (25 photos)


Kinusaiga: master class (video)
How to make a painting on polystyrene foam from fabric with your own hands: a master class for beginner needlewomen
We can talk about the art of kinusaiga for a very long time. But it’s better to see how to make at least a small masterpiece with your own hands. Below is a technique for creating a painting on foam plastic for beginners.
What you will need to start the master class:
- foam sheet (thickness not less than 1 cm;
- scraps of fabric of different colors;
- scissors;
- stationery knife (scalpel);
- nail file (for threading fabric into foam);
- sketch (your own or you can take any ready-made one);
- carbon copy.
The fabric should be selected to be non-stretchable and thin enough. The edges should not fray.
First, look at what is in stock: old scraps, leftover fabrics that were not thrown away after sewing some wardrobe item. Everything will go to work. If checking the storerooms did not give any results, then you will have to take whole pieces and cut out the elements of the planned picture from them.
Process:
First you need to decide on a drawing. For the first time, you should not choose something complex, with many elements. Let it be easy geometric shapes. And from them you can already build a small cute house.

Using a sheet of copy paper, you need to transfer the sketch onto a piece of foam plastic.

Using a knife or scalpel, make a cut along the contour of the sketch to a depth of about 3 mm.

Cut the selected fabric into pieces of the desired size. Using a nail file or something more convenient, tuck the pieces of fabric into the foam sheet. Thus fill the entire “picture”. The edges of the fabric should fit tightly into the slits.

Cut off the excess edges of the foam with a scalpel or a stationery knife.

Next, the resulting panel can be framed. It can be purchased, or you can make it yourself. If there is suitable materials. You can simply make a border using decorative tape, which you need to secure with beautiful push pins. These buttons are sold at any office supply store. Buttons in bronze or gold colors look beautiful.


The kinusaiga technique is often used to decorate lids for boxes or boxes (for example, for sewing accessories or cosmetics).


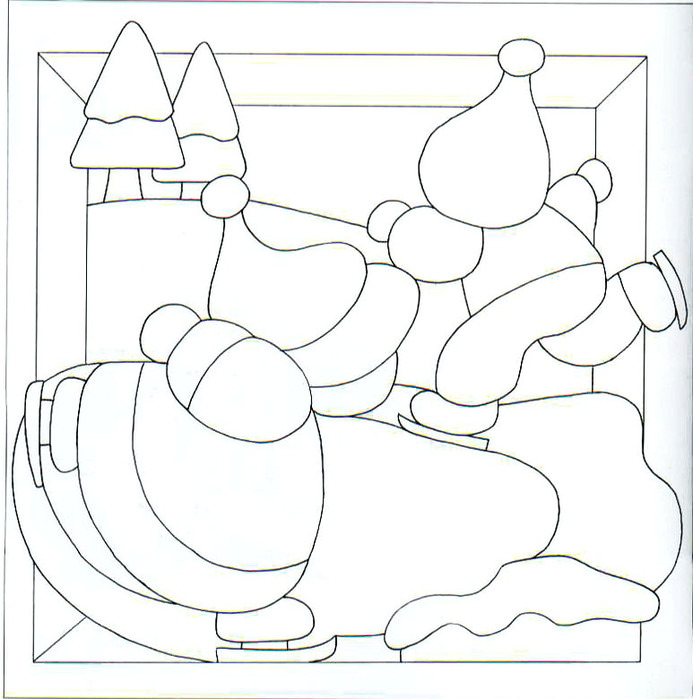
Amazing Christmas decorations and crafts are made using this technique.

Kinusaiga: simple patterns and their execution
Kinusaiga allows the use of any scheme that is at hand. You can buy templates, or you can make them yourself. The easiest way is to use stencils. As an example, below is a Kinusaiga master class using a simple template.
To complete this craft you need:
- A3 size cardboard;
- A4 size cardboard;
- scraps of fabric of different colors;
- padding polyester;
- glue;
- nail file;
- threads;
- needle;
- scissors;
- acrylic paints;
- thin brush;
- cord (soutache) of different colors;
- pins;
- frame.
Scheme for creating a painting:

In your work, you can use any scraps that you can find.
- The drawing must be transferred to tracing paper. Cut into component parts - parts.
- After the division is completed, you need to number the parts of the drawing. Then cut out fabric elements using them. You need to leave a 3 mm allowance along the edges.
- Then prepare the canvas for future painting. For this purpose you need to take a sheet of ceiling tiles. The thickness should be half a centimeter. Glue the sheet onto thick cardboard.
- Glue the second copy of the drawing, which was printed in advance, to the foam. Cut a groove in it, the depth of which should not exceed 2 mm, along the contour of the sketch.
- Apply glue along the cut grooves with a glue stick. When performing this Japanese handicraft for the first time, it is recommended to apply a glue stick to the entire surface.
- Next comes the process of creating the appliqué: the edges of all parts prepared from fabric must be pushed into the grooves so that the edges plunge into the grooves and are tightly fixed there.
Some ideas and patterns for decorating a kitchen using the Kinusaiga technique
Below are sketches and diagrams for designing and decorating the kitchen with Kinusaiga paintings.


This whole application is not done quickly, but the result is worth spending time on. Embroidery with needles takes much longer than paintings made using the Kinusaiga technique. When the basis of knowledge of the Kinusaiga technique is fixed, you can take on more complex panels and paintings that will definitely decorate the house and become a great gift for any holiday.
With the spread of the art of kinusaiga throughout the world, specialized stores began to open, which began to sell tools for this type of needlework. Special sets of fabrics also appeared on sale (not every European has an old kimono at home that can be used for scraps).
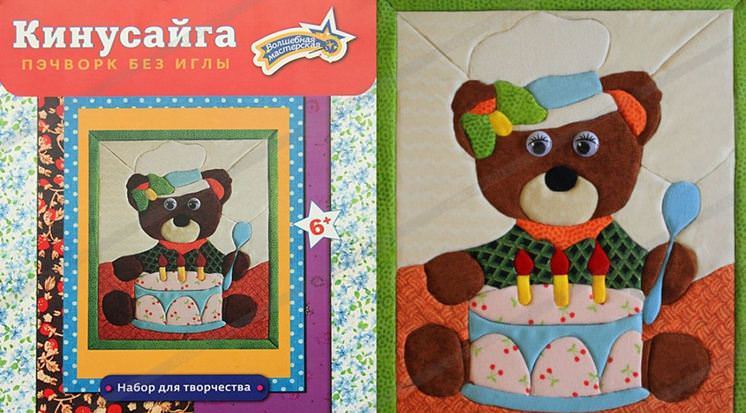
In addition to fabrics, you can also purchase combination sets in such stores, which include tools, fabrics and drawings - sketches of varying degrees of complexity. Such sets are designed for both beginning needlewomen and those who have been practicing this art for several days.
Here's what these sets look like:


The acquaintance with the art of kinusaiga was successful. And surely the number of his fans will increase after reading this article. Try to complete at least one painting using the presented technique - after that you will want to do something else and more. Kinusaiga gets addictive very quickly. And that's good. Because housewives and needlewomen have a new occupation. You always want something new.
Kinusaiga: making a flower (video)
Municipal budgetary educational institution
"Combat Medium" secondary school"
"Box for small items using the Kinusaiga technique"
Completed by: Abdinova Makhabbat
8th grade student
Head: Kryukova Irina Pavlovna
technology teacher
Introduction........................................................ .................................... 3-4 pp.
1. Main part................................................... ........................... 5-6 pp.
2. Practical part................................................... ................ 7-9 pp.
3. Economic calculation............................................................. .............. 10 pp.
4. Environmental assessment............................................................. ............... 10 pp.
5. Conclusion........................................................ ........................... 10 pages
References........................................................ .................... 11 pages
Introduction
Today, all over the world there is a surge in various women's handicrafts, despite the fact that everything can be bought in the store. I wanted to know: how interested are they in the decorative arts? applied arts girls from our school.
After conducting a survey in grades 5-11, we found out that 36% are engaged in handicrafts. Such as knitting, weaving from rubber bands, kanzashi, quilling. I would like to note that the choice is not that varied.
From an online source, I learned the most popular types of needlework at present.
Sweetdesign- this is the preparation of compositions and bouquets from confectionery products, in particular sweets.
Scrap booking- This is a type of creativity for designing photo albums. Quilling- the art of paper rolling.
Decoupage– technique of decoration, decorating, design using cut out paper motifs.
Felting wool- that's pretty fashion technology creating accessories, clothing, jewelry, toys and other decorative items from wool.
Soap making-making soap with your own hands.
While researching various Internet sites, I came across interesting facts. Scientists have proven that a woman simply needs manual labor. Press only the computer buttons and washing machine– this is not enough. Women, apparently, subconsciously feel that they are very carried away by male activities, business and the development of external space. Activity and business intensify left hemisphere, which is responsible for logic and reason. Starts to work while doing handicrafts right hemisphere– illogical, creative and feminine thinking.
Various activities can change the level of hormones in the blood. For example, during male activities, there is an excessive release of androgens (male sex hormones). Have you noticed that if a woman does heavy physical labor, her figure changes, becomes rough and ponderous? And the hands and fingers—they can’t be distinguished from men’s at all. Even when she simply leads, the lightness in the body is lost, the softness in the voice disappears, the movements become fast and sharp.
And when a woman practices cleanly women's affairs– knits, sews, embroiders, then she comes into harmony with her feminine nature, and as a result, the functioning of the female hormonal system improves.
Any handicraft is not only creativity, but also an activity useful for the female psyche. It is the performance of the same monotonous movements that helps to calm down and relax. Such movements cause changes in the psyche. Heart rate changes, muscle tension goes away and nervous system. A natural state of meditation and abstraction from problems begins. Handicrafts help better than anything else to cope with anxiety and internal tension, and get out of stress.
By doing crafts, you tell your body that all is well and everything is calm. Here we are, here are our hands and they are creating something beautiful.
While researching information about needlework, I came across unusual technique- kinusaiga. I was interested in this technique. This technique is unknown among the students surveyed.
Kinusaiga or “patchwork without a needle” - special art from Japan, giving the opportunity from simple materials manufacture wonderful paintings large and small sizes, charming boxes, cards, Christmas balls, covers for diaries. Work using the Kinusaiga technique is expensive, as it is done entirely by hand.
Target: master the basic techniques of performing the Kinusaiga technique and make a product using this technique.
Tasks:
1. Get acquainted with the emergence of the Kinusaiga technique;
2.Master the basic techniques of performing the Kinusaiga technique;
3. Make project work
1.Main part
The history of the Kinusaiga technique.
Kinusayga - enough young art, the year of his birth is 1987. This technique was invented by the Japanese Maeno Takashi. In ancient times, Japan was a poor country, so housewives did not throw away old, worn kimonos. Silk fabric was very expensive, so they tried to use it on the farm. From large pieces things were altered, and small ones were spent on making interior items, in particular paintings, which aroused admiration from everyone who saw them. Then this technique got its name - Kinusaiga. Nowadays, as a consumable material, you can take not only pieces of silk fabrics, but also any others that you have on hand.
Paintings using the Kinusaiga technique took a long time and were difficult to create. Traditionally, Kinusayga was made as follows. First, the artist sketched the drawing on paper. Then the finished sketch was transferred to a wooden board. Recesses were cut into the board, about 2 mm deep. An old silk kimono was cut into small pieces (allowances of only 1 mm), which were inserted into the cut grooves.
The subjects for Kinusaiga most often became landscapes. People very rarely appeared in the painting - depicting faces was a rather complicated process even for masters. In modern art, wooden planks are used extremely rarely. More often, ordinary sheet foam plastic is used in creativity, and not expensive pieces of kimono are used for production, but ordinary fabrics.
Preparing for work
To work on the Kinusaiga technique, you need tools and materials that are at hand.
Materials and tools.
A. scraps of fabric.
b. paper.
V. scissors.
g. pencil.
d. stationery knife.
e. penoplex.
and. steamer or nail file.
h. iron and ironing board.
Safety precautions when making a product using the Kinusaiga technique:
Sanitary and hygienic requirements:
The premises should be kept clean and tidy, and wet cleaning should be done regularly;
The room must be sufficiently illuminated, have the required number of lighting lamps, light workplace should fall from the left side;
After finishing work, clean the workplace.
Rules for safe work with scissors.
Before work, check the serviceability of the tools.
Do not use loose scissors.
Use scissors only in your own workplace.
Watch the movement of the blades while working.
Place the scissors with the rings facing you.
Feed the scissors rings forward.
Don't leave scissors open.
Don't play with scissors, don't put scissors near your face.
Rules for safe work with a knife.
Observe safety precautions.
Slowly and carefully carry out operations with a knife, if possible, considering the appropriateness of use.
Use the knife in accordance with its intended purpose as specified by the manufacturer, or as dictated by the type of specific knife.
Carry out operations with a knife in the presence of normal lighting.
Hold the knife confidently and tightly when performing household work.
Upon completion of operations with the knife, it must be placed in a sheath, with the exception of folding knives, the blade of which is placed in a handle, the length of which does not exceed the length of the handle.
2. Practical part.
Instruction card manufacturing process
| Operation name | Images – photos | Materials and tools |
| Print the template on a printer | ||
| Prepare the base. Cut penoplex 21.5cm x 28cm |
| foam sheet, stationery knife, ruler |
| Pick up scraps of fabric. |
| scraps of fabric |
| Apply an image onto the base dividing the product into small sections. Transfer the drawing to penoplex. |
| penoplex, template, pencil |
| Use a utility knife to make slits along the contours of the design. |
| stationery knife |
| Place the scraps of fabric on the selected location, tuck the edges into the cut out outline. |
| scraps of fabric, nail file |
| Make a background |
| Scraps of fabric |
| Decorate the picture with threads and ribbon. |
| Threads, tape. |


If all are available necessary materials and tools, then you can start making it. For this technique, it doesn’t matter which product you choose, the actions will always be the same. So, having decided on the product, you should draw a sketch.
IN draft You can indicate the colors and decoration elements used.
You should start with the basics. An image is applied to the base, dividing the product into small sections. Next, slits are made with a utility knife.
The next stage is the preparation of fabric scraps. I would like to note that while in some patchwork techniques it is recommended to choose fabrics of the same density, here you can combine absolutely any fabric from silk to wool, the main thing is that it looks appropriate. The flaps should be slightly larger than the pieces on the base, as the edges will be tucked into the slits.
When all the elements are prepared, take the first flap, put it in its place, and its edges are tucked into the cut out outline. The same is done with the remaining parts until the base is completely painted in patches.
Then the product is decorated. Usually the product is decorated along the same contours with various ribbons, beads, and rhinestones.
The picture is framed, or a fabric frame is formed, securing it with buttons. For the durability of the products, fabric flaps or only the slits are coated with glue. To create a relief of the product, you can slip padding polyester or unnecessary shreds under some flaps.
3.Economic calculation
| Name of material | |||
| Used fabric pieces | |||
| Penoplex tiles 30cm x 55cm. | |||
| Glue stick | |||
| Stationery knife | |||
Conclusion: The cost of the product is 108 rubles. The product turned out to be economical and brought me a lot of pleasure.
4.Environmental assessment
Textile waste and building material, which were not thrown into the trash or burned. Thus, they did not pollute the air. Some fabrics are made from environmentally friendly material - cotton, so during production and further use I will not harm myself or others. An exception may be penoplex, but there is so little of it that I think it will not do any harm environment.
5.Conclusion
Working on the project helped me get acquainted with the amazing Japanese technique of Kinusaiga. I learned a lot of new and interesting things about this technique and created my own product. Now this box for small items will come in handy in the technology room.
I believe that the goal has been achieved.
I liked working in this technique. I will continue to create products using the Kinusaiga technique, as this activity is calming and allows you to decorate the interior of your home. This is an interesting alternative for needlewomen without the use of threads and needles. Arm yourself with everything you need and start creating! After all, things made with your own hands will never lose their popularity and will always be present in our lives.
References:
Zaitseva A.A. Patchwork without thread and needle / Anna Zaitseva. – M.: Eksmo, 2010. – 64 p. : ill. – (ABC of needlework)
E. Burlaka: Patchwork without a needle. Editor: Martynova Yu. Publisher: AST-Press, 2016 Series: Silver Library of Hobbies
Kinusaiga is the art of creating paintings from small scraps of fabric. Given the thriftiness of the Japanese, in ancient times housewives did not even think about throwing away old kimonos.
Often a worn item would be made into a haori (a cape over a kimono) or a smaller kimono for a child. The remaining scraps were used to sew dolls, amulets, and pillows. But even the scraps, the smallest pieces of old kimonos were not thrown away, but were collected to create small paintings.
Technique kinusaigi very ancient, in Japan they still adhere to the old principles of work. A wooden board is always used as the basis for a painting; it was already in Europe that foam boards began to be used.
New keen interest in the traditional Japanese type of needlework has aroused Maeno Takashi, Professor at Nagoya University. She is credited with the role of ancestor contemporary art kinusaigi. Maeno introduced the whole world to three-dimensional paintings, the mere appearance of which makes it difficult to even think that they were made from unnecessary pieces of rags.
The Kinusaiga technique is simple and difficult at the same time. First, a sketch of the future painting is applied to the paper, which needs to be transferred to a wooden board. After this, thin grooves are cut along the contours of the image with special cutters.
Now it’s the turn of the imagination: selecting fabric according to color and texture, placing it in the picture. The fabric is cut into pieces of the required size and tucked into pre-laid grooves. The character and amazing volume of the painting is given by the use of various techniques: tying knots, tensioning, gathering, etc.
Previously, Japanese housewives created their paintings only from silk, today a variety of fabrics are used. Even light tinting with paints is allowed, but still, real fans of kinusaiga prefer the natural colors of the fabric.
The kinusaiga technique, when performed masterfully, can deceive the eye and make it seem like we are looking at photographs. As a rule, the subjects chosen are streets, bridges, nature, flowers - everything that deeply excites the souls of the audience, helps to get acquainted with the traditions and way of life of the Japanese people.
Valentine's card
2. Materials and tools
For work you needed:
Album sheet. A simple pencil. Polystyrene - 20*30*3 cm. Stack. Stationery knife. Carbon paper. Blue fabric 30*40 cm. Colored scraps of fabric. Scissors. Frame fastener. Ruler. Hot glue gun.
3. Safety rules when working with scissors
- Do not hold scissors with the blade facing up.
- Do not leave scissors with open blades.
- Pass the closed scissors rings forward.
- Do not play with scissors, do not bring scissors to your face.
- Store scissors in a case with the blade facing down.
-
 April 17, 2015Products that loosen and strengthen stool in adults
 -
 April 17, 2015Why is there brown discharge?
 -
 April 17, 2015Developmental tasks for children on the topic “Family


