Pictures for sketching with a pencil: beautiful and easy images. Drawing step by step
- Pencil. You will need the simplest and most intuitive drawing tool in any case. Even if you want to learn how to draw with paints, you will need a simple pencil to create a sketch. Not all pencils are the same. Some are for drawing, others for drawing, others for everyday tasks. Too much hard pencils(3H, 4H and more) is better not to choose: they can easily scratch and tear the paper.
- Watercolor. Water-soluble paint is known for its lightness, transparency and wide palette of shades. However, painting with watercolor is quite difficult: you need to learn how to use its properties and have a good idea of how the paint will behave on paper. On the other hand, if you put in enough effort, you will learn to draw in one of the most impressive techniques.
- Gouache. This is a thick matte paint that is diluted with water. It is perfect for the first steps in drawing. Thanks to the dense texture of gouache, dark tones can be easily covered with darker ones. This is very important, because then all the flaws and shortcomings can be corrected. One more good news: gouache is inexpensive.
- Pastel (dry). These crayons are used to create designs in soft colors. Due to its texture, pastel is very easy to shade, which allows you to create beautiful transitions between shades. You should immediately prepare for the fact that your fingers and table (at a minimum) will be stained with dust and pastel crumbs. The finished pastel drawing is easy to smudge, so the pigments on the paper will need to be secured with varnish or fixative.
- Markers (“copies”). We asked artist-illustrator and teacher Anna Rastorgueva to tell us about this instrument, relatively unknown to most. Because she draws with markers and does it great. We are not talking about text highlighters or simple felt-tip pens, but about alcohol markers, which, thanks to their base, do not deform the paper and allow you to achieve smooth transitions between shades.
There are many manufacturers of such instruments, including Japanese brands, German, Chinese, Korean, and Russian. The price also varies - from 160 to 600 rubles per piece, so even a novice author can pick up a small kit to get started.
The palettes of this type of markers are unusually wide, with an average of 300 colors, so in order not to get confused, you can purchase a ready-made set, usually selected on a specific topic: architecture, nature, manga.
What if I don't know what to draw?
If you don’t know what to draw, but really want to, copy, draw and repeat after others. There's nothing wrong with that. On the contrary, this is a normal process. Take a picture that you like, put it in front of you and start.
Video instructions help a lot. Unlike advice in the style of “draw a circle, add sticks, add details - you will get a great canvas,” these notes do not lie. You will see exactly how the drawing is created.
Remember: creativity is an international thing. Don't be afraid to check out the YouTube channels of English-speaking bloggers, even if you don't understand what they're saying.
Try starting with these channels:
- Proko. An absolute must-have for anyone who wants to learn how to draw. The artist clearly, simply, and clearly explains the most difficult thing - how to draw a person. This is the base and foundation, so the channel will probably be in your bookmarks.
- Mark Crilley. The artist works in a cartoon style, so those who want to learn how to draw cute, cute drawings will find everything they need here. The artist shows different techniques and in detail, frame by frame, demonstrates the simplest techniques for creating an effective drawing.
- Sycra. The channel will appeal to everyone who loves japanese cartoons and wants to learn how to draw anime. Video tutorials cover the topic inside and out: body structure, facial features, costumes and everything, everything, everything.
- Bob Ross. Bob Ross is an American television legend. Perhaps the most inspiring program in the world was created by this man, who for 11 years taught people to create miracles on canvas. You may not understand what Bob says in his soft voice, but you cannot resist the artistic talent that penetrates you directly from the screen.
In general, choosing a topic is the second fundamental issue after choosing the material. And here it is not at all necessary to limit yourself to traditional genres: portrait, still life or landscape. These days, daily household sketches are becoming increasingly popular. Like Instagram photos, artists quickly capture exciting topics in their notebooks, publish them on social networks, study and communicate together. The subject of interest can be absolutely any object - from macro-sketches of insects to travel diaries detailed in every detail.
Anna Rastorgueva, illustrator, teacher
"You Can Draw in 30 Days" by Mark Kistler. One of the most famous books about drawing. As many years of observations show, after reading it and, importantly, following the instructions, everyone learned to draw.
"Discover the Artist in You" by Betty Edwards. Those who have doubts can immediately be informed: from this book, about 2 million of those who considered themselves “armless” have already learned to draw. For those who don't believe in anything at all own strength and thinks that all artists know some secret beautiful paintings, we say: yes, the secret exists. It's hidden in this book.
“A sketchbook that will teach you how to draw!”, Robin Landa. As a teacher himself, Robin knows that students draw best on the pages of their textbooks. This is where fantasy comes into full play! Therefore, he created a book in which you can (and should) draw. And learn along the way.
I want to draw, but I don't have time or extra money
 Eugenio Marongiu/Shutterstock.com
 The first step can be taken without much investment or effort. Download creative apps and get started right now.
Tayasui Sketches. One of the most beautiful and simple applications with numerous tools will teach you how to draw in different techniques.
Bamboo Paper. Wacom, a company that creates drawing tablets, has developed its own application for artists. Sketches, sketches and full-fledged drawings - this program will be needed at every stage of learning.
Zen Brush. This application will not help with learning, but it will put you in the right creative mood. With a brush you can draw characteristic strokes, and the finished drawing looks like a work of art from some distant eastern country.
We’ve sorted out the materials, the sources of inspiration, too, the books have been studied, and there are applications for the laziest. It's your turn - it's time to get down to business.
The main thing is to find what you really like. Go for it!
Anna Rastorgueva, illustrator, teacher
Do you dream of learning to draw? And look for detailed step-by-step drawing lessons for beginning artists? I will try to help you in this difficult matter and tell you about the many nuances when writing beautiful drawings and portraits in pencil and watercolor! With the help of my step-by-step lessons, master the basics fine arts Not only adults, but also children can!
In this section I publish all my step-by-step drawing lessons, and separately, in the section Drawing Lessons for Children, I collect simple lessons drawing for beginner artists. Therefore, if you are just taking your first steps in drawing with pencil and watercolor, I recommend starting your training with this section. Be sure to check out all the drawing lessons and tips for artists collected on my blog!
Before you start painting a full-fledged portrait, you need to learn how to draw the details of the face. In today's lesson we will learn, how to draw lips in pencil, thanks step-by-step description. The lesson is not difficult and is intended for beginner artists, but do not rush. To achieve a result, namely beautifully draw a person's lips, you need to carefully follow the rules of construction and shading.

Almost every person wants to have their own portrait at home, which is considered one of the most complex drawings what an artist can draw. It is not surprising that there is a great demand for this type of drawings. Therefore, it is the responsibility of the beginner and experienced artist The point is to step by step improve your skills in drawing a person’s facial features, because through the face you can convey not only gender and age, but also the character and temperament of a person. According to their characteristics, portraits are divided into three types: children's, women's and men's. Today we will learn to draw the last view - male portrait with a simple pencil. It has its own characteristics and secrets, which we will tell you about in this step-by-step lesson.


Many people dream of painting a portrait of their family and friends. But before you draw the face as a whole, you need to learn how to draw the details of the face. This lesson for beginning artists is devoted to the question “ how to draw a nose" This task is not difficult, you just need to use the information about constructing and applying shadows. The shape and size of the nose may vary, but the basic design remains the same. Let's quickly find out how easy it is draw a nose with a pencil.

Hands are a personal and unique part of the body. They can often tell a story about a person's life through their shape and size. For many years people study their lines and structure, trying to read the future from the lines. Today we will learn draw hands with a simple pencil by using step by step lesson. Let's pay special attention their construction and application of shadows so that the drawing comes out as realistic as possible.

A step-by-step lesson on how to draw a woman's portrait with a simple pencil. After going through just a few steps, you can understand the main features that are inherent in portrait of a woman
and are absent in the rest. The face will be positioned from the front, hair pulled back. This is important to know before starting work. Now you can get started.

I am pleased to present to you an improved and expanded manual abouthow to learn to draw. I hope that it will cover most of the questions that I am regularly asked in the VKontakte group. For example, such as:
- where should I start learning to draw if I have never drawn?
- How can I learn to draw people?
- how to learn to draw on a computer?
- What drawing books are worth studying?
- How can I learn to paint with acrylic, oil, pastel, and other materials?
I have collected the most useful tips from artists from the site www.quora.com , and it turned out great step by step guide
, thanks to which no one will be able to hide behind excuses like “I don’t know where to start, I can’t do it, I’m mediocre, etc.”, believe me,
you will finally find out
how to learn to drawb!
Just follow this manual step by step and dedicate enough time to practice, and you can come from this drawing level
to this

Some lyrics
Drawingis a skill that develops with practice. You're not alone when you think you're terrible at drawing! All great artists started by drawing stick figures like this:
The reason they moved on from these so-called "stick figures"to something much greater, is that they had insatiable desire to draw getting better and better with every new touch of pencil to paper. This desire set them apart from the rest and is the only reason they became successful.
First of all, the fact that you decided to dedicate your time to improving your drawing skills is already a great achievement. Why you ask? This is really important because in art and creativity there must be passion, interest, curiosity and dedication, without which the learning process will not be as effective.
So in your case, the biggest obstacle is already behind you and you can start drawing by observing the things around you! That's how simple it is!
The following steps that I am going to suggest should help you gain the drawing skills you want and will also show you the path that you will have to go through to become an artist.
But before you blindly follow the path below, always remember that you are free to choose your own unique path—the path that is right for you. The real challenge is to practice regularly with the intention of learning., so it doesn’t matter where you start your drawing journey.
note that each step mentioned below may take weeks, months or even years to achieve perfection in it. It all depends on how much you really want to improve your skills and how much effort you are willing to put in.
There is plenty of material available online for each step below, including YouTube. I recommend checking various sources, studying different styles and practice the style that suits you best.
Let's get started!
Step 1. Learning simple shapes
First, take a paper and pencil (or pen), sit in a comfortable position, clear your mind of thoughts and just focus on the task at hand.
Now try creating a simple form. For example, draw a circle and then continue to practice it.
Try to draw a perfect circle every time. If you really take this task seriously, it could take us several days or even months. Draw smooth circle using only your hands is more difficult than you imagine.
Just start drawing circles and keep practicing these circles until you reach a stage where you can draw a perfect circle without using any assistive tools.
Your attempts will start with something like this:

After regular practice, your hand-eye coordination will improve and you will begin to draw better:

It's pretty good result. Now move on!
Likewise, start working with others basic figures , such as triangle, square, cube, octagon, etc.
This should keep you busy for a while again. Remember, this is a herculean task if your first drawing was the circle from this tutorial.
But after you devote some amount of time (say 6 months or one year), once you pass this rigorous exercise, and once you become a champion in drawing any of simple figures if desired, another interesting facet will appear.
At this point there are two approaches you can follow:
Approach 1 - self-learning
You can learn to draw on your own using free online articles, YouTube videos, books and tutorials.

Easiest to digest drawing lessons for beginners I'm reading Mark Kistler's lessons from the book.
After completing all the lessons, you will achieve significant success. However, although the author stated a period of 1 month, I would advise you to take your time and devote at least 1-2 hours to each lesson, completing all the practical exercises.
Approach 2 - Enroll in an art school or online course
If you don’t like self-study, then I advise you to sign up for paid courses, where they will tell you everything in detail and show you, and also force you to work practically.
The highest quality and most interesting I consider courses and master classes at Veronica Kalacheva’s drawing school.
This school offers both in-studio and online training. There are also useful free materials, which .

This school often hosts free webinars or lessons are opened for study for a while.
Register so you don't miss them!
Veronica Kalacheva's drawing schoolAnother site with paid but cheaper drawing courses that I like is arttsapko.ru. You can also take some courses for free on this site. There are one-time classes that take place in Moscow.
arttsapko drawing schoolFurther advice will be more suitable for those who chose the first approach and decided to study artistic art on one's own. But yours creative path may contain both approaches.
Step 2: Shadows and Shades
Now that you know how to draw simple shapes perfectly, let's Let's start shading these shapes.
I will continue with the example of a circle.
So, yours first attempt at circle shading, without understanding how to do it correctly, would look something like this:

Notice that even though your image didn't turn out very realistic, you were already subconsciously aware of the imaginary light source and placed it in the upper left corner and, given this source, you drew a shadow on the opposite side in the lower right corner.
That is, in order to shade objects you need common sense and nothing more.
Now continue practicing shading. It may take several months before you get something like this:

Now this circle looks like a volumetric sphere.
Next, you need to show that the sphere is not dangling in the air, but is on some surface, and you will begin to depict the shadows that the object casts on other surfaces. In this case, the drawing should already look something like this:

Always remember one simple rule, which has been demonstrated in the figure below:

Also, continue to practice shading and other shapes you've learned.
As you practice, notice how the shades vary depending on the availability of light. Look at the tonal scale with shading from light to dark below. You can use it as a guide when you draw a figure.

Keep practicing. It's an endless process!
Step 3. Perspective
The basic law of perspective says:when an object is closer it looks larger and if it needs to be shown further away it will need to be drawn smaller. If you understand this, you understand the basic law of perspective.
Now let's look at the so-calledvanishing point.
I will explain this concept using the example of a cube.
When we draw a cube, why do the length and width of that cube taper towards the end or slope inward on the paper? Look at this picture below for reference and ask yourself why is this happening?

As you can see, the ribs taper both to the right and to the left, as if they are going into the inside of a sheet of paper. This is what gives the cube the illusion of “3D” on two-dimensional paper. And this is possible, based on the basics of perspective and such a concept asvanishing point.
Now let's look at the same cube again.
In the cube, we took the vanishing point somewhere far from our eyes to the right and left of the cube. That's why the sides narrowed to inside papers on the right and left. The figure below clearly shows how the edges of a cube, if extended, will converge at one point on both sides. These two points are called vanishing points:

Now look at the green dot in the following cube drawing:

This green dot is alsovanishing point.
Imagine what a cube would look like without this vanishing point concept. It will look more like a square in 2-D.When we draw a cube, we should always remember the vanishing point, since it is this that gives us the opportunity to depict a three-dimensional figure.
So, I hope that the concept of a vanishing point has become more clear to you, because for anyone good drawing, which is drawn taking into account the space and distance between each object, the vanishing point concept should be followed by default.
Here are some more examples of the vanishing point concept for your understanding.
- Top view (or bird's eye view):

- Linear perspective (landscape):


- View with many vanishing points (any real scene):


Thus, as depicted in the third example, in real scenes there are usually several vanishing points, and these points give the drawing the desired depth or 3-D effect, and a sense of space that separates it from 2-D.
Too difficult? Just don't panic now, okay? At this stage, it is enough just to understand the concept of a vanishing point. Just try to show the vanishing point in your drawings without any drawings or measurements.
This "step 3" was just a prerequisite for learning the laws of perspective, just to make you aware of its importance in drawing. Mark Kistler's "Learn to Draw in 30 Days" course has several step by step lessons to build perspective, you can start with them.
Step 4. Draw complex shapes
Now using your confidence in drawing and shading simple shapes, as well as knowledge of the shadow effect and vanishing point, move on to the next level, that is, drawing various complex shapes.
The rules of the game remain the same:
- Keep practicing.
- Observe the nuances.
- Try to surpass yourself every time and not repeat previous mistakes.
So first, how about an egg? It's not that different from a circle, right?
Let's just get started. Practice until you get it perfect!

Okay, it looks like an egg. Now try different fruits. For example, strawberries.

Great! These are really good strawberries. And look at this detail.The strawberry in the last picture looks quite difficult to draw, but we already have experience with shading from “step 3”. This is the same thing, only at the micro level. Believe in yourself and everything will work out!
Likewise, continue drawing different random shapes with shading. Place shadows on these drawings, taking into account effects such as reflection, refraction, transparency, etc. And just keep practicing.
There are many different objects around. Learn to draw what you see. This is one of the most important steps to become a professional artist. Don't worry if you don't do it very well at first. Sometimes when you start drawing what you see, the beginning of the sketch can look pretty terrible, but the end result can be amazing. So start doing it!
Try drawing two random objects a day. The drawing must be complete: drawing + shading + drop shadow + any other special effect.
Something like below:

Just repeat this process every day. You are on the right track!
Step 5. Draw living creatures
Since we now know how to draw and shade various objects with relative accuracy, it's time to draw moving objects and living organisms. Now it is necessary to include the movement of objects, their pose and facial expressions in the drawing, this is a real challenge!
The most important advice is to keep your eyes and mind wide open. You have to watch everything around you.
So observe all the nuances - people walking, a bird flying, a dog's posture, etc. And, when possible, create quick sketch this specific position, movement, expression, etc. And work on the details later in your own free time.
You should end up with something like this:

This is a quick sketch that can be completed in minutes. Go to a park or cafe and just sketch the people you come across. In this case, the main thing is not quality, but quantity. You need to see and convey the subject's pose.
Study anatomy.Yes, anatomy is the same as in biology class. You need to study the bones of the skeleton and the location of the muscles. This may seem weird and creepy, but on the other hand, it means you can draw a skeleton and skull for Halloween decorations :) This will also help in learning about human proportions and body movements. The same goes for animals - read books on animal anatomy. Almost everything art books on drawing animals will have an anatomy section.
Try starting with my article:
Then try quickly drawing a few different facial expressions:

Observe and remember the differences between facial lines. Later, keep adding shadows and make them look even more realistic, like this:

Do the same with trees, flowers, animals, birds, etc.

Now that you know quite a bit, using your acquired skills you should be able to draw something like this:

Persistence, difficulty and pain will then lead you here:

And in the case of people (a little better or worse):

Now it's time to pause and take a look at the image below, this beautiful woman. She really looks very beautiful, doesn't she?

And if you ask yourself, can you be confident enough to draw her as beautiful as she is? Chances are the answer is a big “No,” right? If so, then you still have some way to go!
So your drawing is still in its infancy and there is a lot of room for improvement.For example, you will have to work on detail human eye and his movements, human hair, its shine, etc. I think you understand what I'm trying to say, don't you?
So basically, at this stage, you have to surround yourself with these challenges all the time in order to move forward and not get stuck in the middle.No one will help you with this except yourself!
Step 6. Trying different tools and materials
It's great if you can draw with a pencil, but it will be much more interesting and useful if you also learn how to use ink, paint, markers, pastels, etc. You should try different materials , if only because you may come across something that you especially like. Add color to your sketches!

Of course, art supplies are not cheap now, so you shouldn’t buy professional materials right away, in case you don’t like them and want something else? For starters, tools from the mid-price category will be enough. Now it's very large selection inexpensive art materials can be found at AliExpress.
Don't use fancy art boards or moleskines. Buy a large notebook or album with white sheets. Your goal is to do as much as possible and faster than sketches without having to worry about wasting expensive paper.
Also, if you decide to try yourself in digital art, you don’t have to immediately take up licensed Photoshop, when you can start with free editors, for example MyPaint, SAI, GIMP.
 Author: TsaoShin
 Step 7. Landscapes
Now put everything together. You should start drawing landscapes with people, plants and many animals. In this step you will have an excellent opportunity to practice your knowledge laws of perspective.
To start, you can try drawing panoramas, such as the view from your window.Try to first draw landscapes more “roughly”, for example like this:
 After that, detail the objects.
After extensive training, your drawings will look something like this:

Step 8. Draw from imagination
Start with something simple, like an apple. Simply move your pencil onto the paper, only imagining that you are drawing an apple before you draw it. Then do a quick preliminary sketch to get its shape and the shape of its shadow in proportion to the page. Then start shading and detailing.
Then try to draw something more complex, for example, flowers, trees, a glass, a pen, etc. Each time try to choose more difficult objects. At this point I can give no further advice other than Practice regularly.
Step 9. Forming your own style
Now you know everything. By at least, enough to start developing your own artistic style.Your style should be unique, and you should continue to develop it with intense practice.
Please note that I can't add anything more to this step because I don't know what your own unique style will be. I can only advise
The internet is full of resources to help you with inspiration and ideas, such as Pinterest, Instagram, Tumblr, YouTube. I recommend checking these sources regularly, learning about different styles, and practicing the style that suits you best.
Step 10. Getting better
This step is about refining to the point where your drawing is indistinguishable from a photograph or real image. Of course, it is optional. But if you still If you want to develop your skills to drawing in the style of hyperrealism, this will also require a lot of practice.
Although drawings that cannot be distinguished from photographs are signs amazing craftsmanship authors who have put in a lot of effort, there are equal examples of amazing work that Not look like the photos. So you should also keep this in mind.
Here is an example of a hyperrealistic drawing:
Sensazioni, author: Diego CoyStep 11. Practice, practice, practice.
Artistic skills don't come with fancy sketches and pencils. This comes with practice. It is believed that in order to become a professional in your field, you need to devote a certain amount of time to it - from 2000 to 10,000 hours!

Every time when you have free time, sit down and draw something, or practice your shading, tone, etc. There are so many things to master - you always need to practice. Draw easy objects and complex ones. Draw people in detail or rough lines. Master everything as much as you can, constantly improve your skills.
Moreover, it is desirable that the practice be accompanied feedback. It’s just imperative that these viewers tell you the truth, so mom and dad are not suitable for this role.Alternatively, you can post your work in some art community or forum. Ours could serve as such a place.
In childhood, a child does not think about why and what to draw. While drawing, he reworks his life experience, transferring it to paper, and thereby comprehends it and develops.
As you get older, it becomes more and more difficult to find ideas... We get distracted by everyday affairs, we stop hearing ourselves, our inner world. It is especially difficult at the beginning, when you are just embarking on the path of discovering yourself as an artist.
To draw well, you need to draw every day. But where do you get the inspiration for this?
Here are some ideas for you: how and what to draw every day.
What to draw? 11 ideas for daily drawing.
1. Go through the archives of your drawings and sketches.
The simplest thing is to open a folder with your old drawings and look at them.
What is unfinished about them? Where did the hitch occur? 
Look at the drawing with fresh eyes. Think how to modify or rewrite it.
In addition, immersing yourself in past drawings will immerse you in the emotions that you previously experienced. This may reinvigorate your creative muse. Maybe based on an old idea a new one will arise... And then another picture will be born.

2. Draw something from life.
Take a look around the house: walls, furniture, interior items, potted plants, souvenirs brought from trips that keep your memories. What caught your eye? 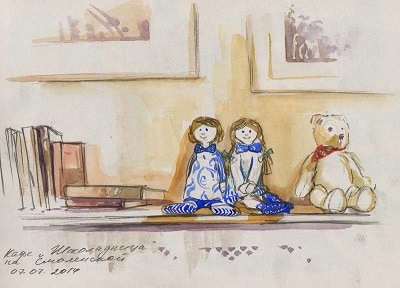
Draw one object. You can add other objects to it and draw the background.
As a result, your drawing can turn out to be very atmospheric, keeping the warmth of the house, your thoughts and memories

I suggest watching a recording of my speech on Periscope on the topic of quick sketches from nature. I hope you find this video helpful.
Sketch of a plant from life
3. Draw an abstract combination of spots.
Unleash your imagination, imagine yourself as a creator and get the most out of the play of color, how the paint flows and mixes, what new shapes and shades you observe. Cast aside doubts and fears. Create! This is great color therapy.
Depict your day, your mood, and capture it in color.


4. Create a hand-drawn recipe.
The process of cooking itself can be very creative. And if you also transfer it to paper... Write down your culinary ideas, make them beautiful pictures, create your unique recipe books. In the future, this will inspire you to continue to create in cooking and drawing.

Don't know how to draw recipes? Watch this video:
Recipe drawing: charlotte with apples!
![]() More interesting and useful information about drawing
More interesting and useful information about drawing
from the artist Marina Trushnikova
You will find in electronic journal“Life in Art”.
Receive magazine issues to your e-mail!
5. Draw a sweet little something for your friends or family.
This could be a postcard for a holiday - for a birthday, for the New Year, for March 8 or Valentine's Day. Or just a cute impromptu for no reason... 
Receiving a handmade card in the age of email is unusual. Such gestures are always very pleasant.
The emotions of gratitude received in return will certainly give you inspiration to continue the creative process.

6. Practice quick sketches.
Draw people and animals using sketchy human and animal anatomical figures.
To complicate the task, use a timer, setting yourself the time for this work in seconds.

In the future, the ability to quickly draw a human figure will inspire you to make quick sketches.
Watching and noticing interesting stories, types and characters, you will be able to draw, snatching scenes from life: on the street, in the theater, in a cafe, at work.
This will allow you to develop yourself, your worldview and the inner feeling of an artist.
Seconds timer:
7. Practice creating monotypes.
Learn to create monotypes. This will allow you to create without initially thinking about the plot. Monotype will do this for you.
Use your imagination! Experiment! A monotype print will give you many opportunities for spontaneous solutions. Examine the image in the spots and streaks that have appeared. And draw in the spots a little to help the viewer see this image.

 Start painting with watercolors today!
Master the basics of watercolor painting with this popular course
“Taming Watercolor”
8. Draw a graphic design.
Do you like to draw with a simple pencil or in black and white?
Then try your hand at graphics! This can be drawing a spot with further drawing of details with a pencil, gel pen, ink or marker.
Or maybe you will first make some kind of drawing graphically, and then complement it with a background, add volume to the details, fill it, fill it fancy patterns, lines and scatter splash spots.

Practice making doodles!
9. Draw in a travel sketchbook.
Going on a trip? Bring a small sketchbook with you! 
A notebook filled with impressions and drawings (as well as booklets, tickets, receipts, napkins... and other “tourist trash”) will become no less valuable a memory than an album with photographs.

 IF YOU WANT:
- learn to quickly record your thoughts and impressions
- remove the fear of drawing in public
- bring beautiful travel books back from travels
then my sketchbooking workshop
will become an invaluable assistant for you in this!
10. Browse the websites of your favorite artists.
Look at their paintings, find something that catches you and touches your soul. Compare different techniques, try to imagine how this or that picture was painted, what the artist felt, what he wanted to say, how he saw the world while working. 
Look at your favorite painting by your favorite artist and try something like this. Or just copy a piece of the painting to study the technique, repeat it as you understand.
Not all children, when they pick up a pencil for the first time, draw masterpieces. And the point here is not at all about talent, because every child initially has it. Where to start?
It is important how to draw pictures step by step to get a good result.
You can start doing this already at the age of 3-4 years, when the child is already conscious about the activities. To begin with, you should choose simpler pictures that clearly describe how one of the simplest geometric shapes you can get, for example, a pig or a turtle. The last stage of drawing is also important for kids – coloring the picture.
How to draw children's drawings?
When the child already knows how to draw individual objects, you can already try to arrange them. Before you draw a simple drawing, you need to discuss what exactly the child wants to depict on it. After this, you need to determine the location of the individual parts on the sheet and proceed directly to drawing.
It’s enough just to draw the well-known bun on a forest path surrounded by flowers and berries. The sketch is made with a simple pencil and then colored with paints or felt-tip pens.

How to draw cool easy drawings?
Older children want to act funny cartoon characters, and there is no difficulty in this. Using the same geometric shapes (oval and circle), the body of the animal is drawn, and the remaining details - a fluffy tail and muzzle - are done in the form of shading. All that remains is to color the drawing in any convenient way.
 |
 |
With the help a simple pencil You can easily draw your favorite animals. Girls love to pretend to be a horse. This graceful animal is probably already in your toy collection. To begin with, you should outline the head and muzzle of the animal with light strokes, and then begin to draw such small details as the eye, ears and mane.
-
 April 17, 2015"Marble" cupcake: recipes and cooking methods
 -
 April 17, 2015Recipe without sterilization with onion sautéing
 -
 April 17, 2015Lazy achma in a slow cooker
 -
 April 17, 2015Achma from lavash in a slow cooker


