How to learn drawing. How to draw the eyes of cartoon characters. How to beautifully draw clothing sketches with a pencil
The craft of a good draftsman is based on 2 basic things: the ability to control your hand and correct vision. If you want to create or design websites, then you can’t do without special training.
The next 6 sections of the article are essentially the first step in in this direction— you will learn how to learn to draw and where to start. Immediately after this, proceed to the second part of the topic and go through some more.
This is a translation of a note from Medium by Ralph Ammer (all the graphics are his).
Advice. For the next 6 tasks, use one type of pen and one type of paper (for example, A5).
Dexterity of hands - two trainings
The first two techniques are about controlling your hand. You should train your hand, and also learn to coordinate the vigilance of the eye and the movement of the hand. Mechanical practices are great for beginners. You can use them later to try out new tools. They also allow you to relax and take a break from mental or physical work. So, how to start drawing correctly.
1. Many, many circles
Fill a sheet of paper with circles of different sizes. Try not to let the circles intersect.

Learning to draw circles is not as easy as you might think. Note that the more circles there are on the paper, the more difficult it is to add the next one. Draw them in two directions and as many as possible.
Advice. Shake your hand when it starts to cramp, do this after each approach.

2. Hatching - creating a structure
Fill a sheet of paper with parallel lines.

Diagonal lines are the easiest for us, as they correspond to the movement of our wrist. Note that a left-handed person prefers the opposite direction of strokes than a right-handed person. Take a look at your favorite artist (in my case, Leonardo da Vinci) and try to guess which hand he wrote with?

Try different stroke directions. Enjoy the shading process. Combine different strokes and enjoy how the paper is covered with different shadow spots.
Advice. Do not rotate the paper. It is very important to train your hand in different directions.
So, after we trained our arms, we need to do some exercises for our eyes!
Perception - learning to see
Drawing is primarily about vision and understanding what you see. People often assume that everyone sees the same thing, but this is actually not the case. You can always improve and improve the quality of your vision. The more you draw, the more you see. The following four techniques will force you to expand your view of familiar objects. This is exactly where they start learning to draw in different courses.
3. Outline - show me your hands!
Do you see these different fascinating contours of your hand? Draw them on a piece of paper. Don't try to recreate everything, just pick a few of the most interesting ones.

Whether you're drawing a person, a plant, or your favorite animal, you're creating an outline of what you see. Contours define a body or object and make it possible to recognize a pattern. The goal is not to immediately display all existing distinctive features, but to learn to see them!
Even if you know the shape of an object, it's still worth taking a closer look and re-examining it.
4. Chiaroscuro - adding light and shadow
Draw a piece of fabric. Start with outlines, and then use your shading skills to find the light and shade transitions.
This exercise will help you learn how to convey light and shadow on paper. I must admit that this is not the easiest way for beginners. Keep in mind that you don't have to make perfect light and shade transitions. The fabric provides a playing field to practice the skills learned in previous lessons. Plus, you'll also understand how to learn how to paint chiaroscuro using just your hand.
Advice. You can do curved shading to create shape and cross shading to achieve deeper shadows that resemble fabric texture.

Advice. Close your eyes slightly when looking at the fabric. You will see a blurred image of the fabric and increased contrast between light and shadow.
5. Perspective - cubes in three-dimensional space
Let's draw some cubes! Follow simple steps.

Perspective drawing is a projection of a 3D object into 2D space (your sheet of paper).

Building a perspective is a separate science that cannot be fully considered in one article. However, we can have a little fun within the confines of a simple technique that gives us an intuitive sense of the magic of drawing in perspective.
Step 1: Draw a horizontal line. This will be the horizon.

Step 2. Place two points on the edges of the line - two invisible vanishing points.

Step 3. Draw a vertical line anywhere.

Step 4: Connect the ends of the vertical line to the vanishing points.

Step 5: Add two more vertical lines as below.

Step 6: Connect them to the vanishing points.

Step 7: Now use a black pencil or pen to trace the cube.
Repeat steps 3 to 7 as many times as desired. Enjoy the build! Have fun drawing, then you will succeed. You can shade the sides of the cube.

Advice. When you draw cross lines, it is better to slightly overlap one line over the other, this will make the shape easier to see.

Mastering perspective drawings will help you create the illusion of depth. And most importantly, you will teach your brain to see and recognize three-dimensional space. This is a great practice on how to start drawing from scratch without any skills.
Even if you decide to ignore the rules of perspective and make “flat drawings”, this knowledge will never be superfluous, but on the contrary will help expand your horizons and sharpen your visual receptor.
6. Construction of the composition - why here?
Make 5 different designs one object. Position the item differently each time.
As you create various options location of your subject on paper, try to trace how this changes its connotation - meaning.

Author Ralph Ammer has several more interesting articles, but this is the one you need to watch first in order to understand where to start drawing with a pencil and more. In the comments I would like to see your opinion on the pros and cons of the presented methodology. Which exercises really gave you pleasure and which ones didn't? What else do you want to know on the topic or perhaps you have your own ideas on how to learn to draw from scratch - write it all below.
P.S. Free and complete SEO analysis of a website page - sitechecker.pro. In promotion it is important not only external factors, but the web project itself must be good.
Each of us made our first sketches as children. During the drawing lessons, not everyone tried to do the work well and did not think about acquiring skills. In adulthood, many people feel the need to create something beautiful, but how to learn to draw with a pencil? After all, any drawing technique is based on the ability to hold the stylus correctly, make basic sketches, and create images. In this article you will find useful tips for learning to draw, as in art school, and independently.
Pencil Drawing Basics
Experts say that anyone, regardless of age, can learn how to draw correctly with a pencil. Learning to paint always begins with getting to know the materials that a beginning artist needs:
- a sheet of white paper, any format;
- eraser, also known as a rubber grater;
- simple pencils.
The first steps in drawing begin with a pencil sketch. Transmitted through meager lines general outline the object being copied, various poses, moments of movement. The sketch is the most quick way put on paper your first thoughts and impressions of what you are drawing. While sketching, you don’t need to pay attention to unnecessary details; it is recommended to draw it for no more than 10 minutes.
How to learn to draw from scratch
Scientific psychologists have proven that during the process of creating a drawing, both hemispheres of the brain are actively working in a person, and the imagination is activated. It’s not for nothing that there is a technique for calming nerves called art therapy - this is drawing for adults and children. Many people want to be able to, but do not know how to learn to draw with a pencil. Learning to draw from scratch is not at all difficult, because the technique of drawing with a pencil is accessible to children and adults.
Art school
How can a child learn to draw with a pencil? The best solution is to send him to an art school. It is designed for teaching children school age from 6 to 17 years old. Upon admission to this institution, the level of knowledge and skills in fine arts. Depending on the child’s skills, they are assigned to the appropriate group of students.

Education at the art school is free and government funded. I visit this place after main school lessons three times a week. The course of study ranges from two to seven years. After graduating from school, the graduate receives a diploma, which opens the door to an artistic future: admission to a college or higher institution in his specialty.
Courses
How can adults learn to draw with a pencil? You can learn the art of drawing through art courses. They are paid. The course of study ranges from several weeks to four years. During this time, the art studio will teach you the following skills:

- How to draw correctly in step-by-step technique.
- Learn to use a pencil and brush. Teachers in art studio They teach not only the ability to hold tools correctly, but also to choose and distinguish high-quality from low-grade ones.
- Learn how to draw children with a pencil.
- Learn many drawing techniques.
- Learn how to learn to draw various objects.
- Learn to draw from life, landscapes, still lifes, people, animals, etc.
- Learn coloristics - choosing and combining colors correctly.
- Learn how to draw a cat with a pencil and other animals.
- They will tell you how to learn to draw portraits.
Online lessons
If you don’t have free time and you don’t know how to learn to draw with a pencil, then take advantage of online courses. They are suitable for those who are unable to attend a stationary studio. An approximate plan for completing classes in this format for beginning artists:

- The teacher gives basic knowledge in drawing in the form of examples of works, pictures.
- The selected topic of the drawing lesson is discussed in detail.
- At the end of the lesson the teacher gives homework, which you complete and mail to your teacher for review.
- At the next lesson, the student, together with the teacher, analyzes the homework in detail, and together they correct errors in the drawing, if any.
Online lessons, as an option, in order to learn how to draw professionally, are not the only way out. If you do not have the financial and territorial capabilities, but have a great and irresistible desire to learn how to draw well, then you can do it yourself with the help of:
- textbooks and drawing aids;
- tutorials;
- drawing instructions;
- training videos.
Step-by-step drawing technique
A beginner needs to practice drawing by creating sketches. In order for the drawing to be meaningful, the sketch must be created according to the rules that form the plan:
- First, choose an object that you will draw, such as a teapot or vase.
- Examine it from all sides, determine its shape, its texture, how the shadows fall on this object.
- Determine the composition of the drawing, i.e. how it will be placed on paper, in what format.
- After the contours are drawn, draw the details and apply shadows.
Human
In order to draw a person, you need to decide on the composition. This means that you need to analyze the boundaries of the location from head to toe. Once you have a figure in your mind, start composing the body parts. You need to draw a person from a sketch of the contours of the head, going lower. In the image of a person, it is very important to immediately find the image; you should determine the number of details necessary for the finished drawing.
Face
When drawing a person, much attention is paid to the face. To draw it correctly, you need to follow the steps:

- Decide how the face will be positioned on the paper. To do this, mentally draw an axis of symmetry; it should pass through the center of the sheet.
- Draw with a pencil on paper the outline of the face in the form of an oval (shape chicken egg).
- Build the shape of the face, starting from the jawline, moving to the most convex part - the cheekbone area, then to the narrowest - the temporal area.
- Align the drawn lines with an eraser; this will noticeably “lighten” the outline of the oval.
- Divide the resulting oval into three equal parts using light, barely noticeable lines. The very first line, located closer to the chin, marks the tip of the nose.
- Draw the nose, starting from the tip. It always protrudes forward, so it has a round, square, or pointed shape. Then we draw the wings of the nose and the bridge of the nose.
- We draw the mouth, starting from the upper bend of the lip, which is located in the middle of the nostrils of the nose.
Eyes
In a portrait of a person, the eyes occupy the most important place; they attract attention, so they need to be given Special attention. To draw them using a step-by-step technique, you must adhere to the following plan:

- Before drawing the eyes, it is necessary to outline the eyebrows, which are located at the level of the bridge of the nose. Their shape depends on the character that the artist wants to convey in the portrait.
- Having outlined the approximate location of the eyes, we draw out their shape in the form of an oval.
- Draw the pupil in the shape of a circle.
- We line the eyelids and shape the eyelashes.
Anime and Manga
Many young artists begin learning to draw with anime and manga, because... portray people in style bright characters Japanese cartoons are much simpler than classic ones. The greatest emphasis in such cartoon characters falls on the head, eyes and hair. Let's look at a step-by-step drawing scheme, with the help of which a novice artist will learn how to learn to draw anime:

- We start drawing the anime with an oval, which will be the head.
- Divide the circle in half lengthwise using straight line.
- Divide the head crosswise into three parts using light lines.
- Next, you need to note the location of the eyes, nose and mouth.
- Drawing big eyes, starting from the arch of the upper eyelid. The distance between them should be equal to one eye. Much attention When drawing pupils, attention is paid to applying highlights. Eyebrows are drawn on these characters classic style: two even arcs.
- The nose in anime and manga is drawn small, expressed with a tick.
- Lips are drawn with two small lines.
- Anime and manga hair should be drawn in flowing triangles that slightly cover the eyes.
- Anime girls are depicted in bright clothes, mostly dresses.
3D drawings

Volumetric drawings fascinate with their realism, thanks to correct construction shape, applying shadows and highlights in the right places. You should learn to draw such pictures from simple geometric shapes: cylinder, rhombus, square. To recreate the 3D illusion of an object, you need to draw it in isometry, when the angles between the coordinate axes are 45 degrees. Volume is added to the drawing by auxiliary lines, which are drawn inside the figure with light pressure, and the outline is drawn in bold, more dark color.
Portraits

Portraits can be drawn both from life and from photographs. Before creating an image, carefully consider what message it will convey. future drawing. Learn to draw a portrait of a person correctly, not only in terms of proportionality and symmetry, but also to display real emotions. Another task of drawing an image of a person is to convey the maximum similarity of the person being copied. To achieve this, before you start drawing, consider all the details, highlight those features, “highlights” that you will focus on.
Graffiti on paper

Nowadays, graffiti painting is a fashionable movement that is gaining momentum. Many buildings are full of incomprehensible voluminous inscriptions, but quite often there are beautiful, professional drawings on the walls. To ensure that your paintings do not disfigure city buildings, and that expensive paints do not go to waste, you need to practice on paper for a long time. First, try drawing the letters of the alphabet using a pencil. To give them volume, use auxiliary lines.
House

The ability to draw buildings is useful not only for children, but also for people of all ages. age groups, to easily compose pictures, for example, a house with a landscape. Buildings are very easy to draw using lines. You should start with a rectangle, adding a triangle, you will get the image of a house, this is how children draw it. With the help of simple techniques and additional lines, the house becomes voluminous.
Cars

To draw a car with a pencil, you must adhere to step by step plan:
- Mark the outer outlines of the car, dividing it in half with a line.
- We draw the body with thicker lines.
- Then we draw the wheels.
- We draw out the parts of the front of the car: headlights, windshield, bumper.
- We draw windows, doors, mirrors.
Animals

It is much more difficult to draw animals than objects, especially from life, because they constantly change their pose and are in motion. To draw an animal, for example, a horse, you need to decide on its characteristic features: thick mane, elongated muzzle, slender muscular legs. Look detailed instructions, . You may not be able to correctly portray your favorite cat or dog on the first try, but after several practices you will definitely succeed.
Video tutorials on drawing with a simple pencil for beginners
Video tutorials are a great way to learn how to draw on your own. Below is a selection of training videos in which experienced artists clearly show how to create easy pencil drawings for beginners. After watching the video, you will learn how to draw Japanese cartoon characters - anime girls, and learn how to draw flowers. If you like landscapes, then watch the third video to the end, in which the artist paints nature, focusing special attention on the trees.
Drawing girls
How to draw flowers
Beautiful landscapes
How to Draw the Human Body
- Pencil. You will need the simplest and most intuitive drawing tool in any case. Even if you want to learn how to draw with paints, you will need a simple pencil to create a sketch. Not all pencils are the same. Some are for drawing, others for drawing, others for everyday tasks. Too much hard pencils(3H, 4H and more) is better not to choose: they can easily scratch and tear the paper.
- Watercolor. Water-soluble paint is known for its lightness, transparency and wide palette of shades. However, painting with watercolor is quite difficult: you need to learn how to use its properties and have a good idea of how the paint will behave on paper. On the other hand, if you put in enough effort, you will learn to draw in one of the most impressive techniques.
- Gouache. This is a thick matte paint that is diluted with water. It is perfect for the first steps in drawing. Thanks to the dense texture of gouache, dark tones can be easily covered with darker ones. This is very important, because then all the flaws and shortcomings can be corrected. Another one good news: gouache is inexpensive.
- Pastel (dry). These crayons are used to create designs in soft colors. Due to its texture, pastel is very easy to shade, which allows you to create beautiful transitions between shades. You should immediately prepare for the fact that your fingers and table (at a minimum) will be stained with dust and pastel crumbs. The finished pastel drawing is easy to smudge, so the pigments on the paper will need to be secured with varnish or fixative.
- Markers (“copies”). We asked artist-illustrator and teacher Anna Rastorgueva to tell us about this instrument, relatively unknown to most. Because she draws with markers and does it great. We are not talking about text highlighters or simple felt-tip pens, but about alcohol markers, which, thanks to their base, do not deform the paper and allow you to achieve smooth transitions between shades.
There are many manufacturers of such instruments, including Japanese brands, German, Chinese, Korean, and Russian. The price also varies - from 160 to 600 rubles per piece, so even a novice author can pick up a small kit to get started.
The palettes of this type of markers are unusually wide, with an average of 300 colors, so in order not to get confused, you can purchase a ready-made set, usually selected on a specific topic: architecture, nature, manga.
What if I don't know what to draw?
If you don’t know what to draw, but really want to, copy, draw and repeat after others. There's nothing wrong with that. On the contrary, this is a normal process. Take a picture that you like, put it in front of you and start.
Video instructions help a lot. Unlike advice in the style of “draw a circle, add sticks, add details - you will get a great canvas,” these notes do not lie. You will see exactly how the drawing is created.
Remember: creativity is an international thing. Don't be afraid to check out the YouTube channels of English-speaking bloggers, even if you don't understand what they're saying.
Try starting with these channels:
- Proko. An absolute must-have for anyone who wants to learn how to draw. The artist clearly, simply, and clearly explains the most difficult thing - how to draw a person. This is the base and foundation, so the channel will probably be in your bookmarks.
- Mark Crilley. The artist works in a cartoon style, so those who want to learn how to draw cute, cute drawings will find everything they need here. The artist shows different techniques and in detail, frame by frame, demonstrates the simplest techniques for creating an effective drawing.
- Sycra. The channel will appeal to everyone who loves japanese cartoons and wants to learn how to draw anime. Video tutorials cover the topic inside and out: body structure, facial features, costumes and everything, everything, everything.
- Bob Ross. Bob Ross is an American television legend. Perhaps the most inspiring program in the world was created by this man, who for 11 years taught people to create miracles on canvas. You may not understand what Bob says in his soft voice, but you cannot resist the artistic talent that penetrates you directly from the screen.
In general, the choice of topic is the second fundamental issue after the choice of material. And here it is not at all necessary to limit yourself to traditional genres: portrait, still life or landscape. These days, daily household sketches are becoming increasingly popular. Like Instagram photos, artists quickly capture exciting topics in their notebooks, publish them on in social networks, study and communicate together. The subject of interest can be absolutely any object - from macro-sketches of insects to travel diaries detailed in every detail.
Anna Rastorgueva, illustrator, teacher
"You Can Draw in 30 Days" by Mark Kistler. One of the most famous books about drawing. As many years of observations show, after reading it and, importantly, following the instructions, everyone learned to draw.
"Discover the Artist in You" by Betty Edwards. Those who have doubts can immediately be informed: from this book, about 2 million of those who considered themselves “armless” have already learned to draw. For those who don't believe in anything at all own strength and thinks that all artists know some secret beautiful paintings, we say: yes, the secret exists. It's hidden in this book.
“A sketchbook that will teach you how to draw!”, Robin Landa. As a teacher himself, Robin knows that students draw best on the pages of their textbooks. This is where fantasy comes into full play! Therefore, he created a book in which you can (and should) draw. And learn along the way.
I want to draw, but I don't have time or extra money
 Eugenio Marongiu/Shutterstock.com
 The first step can be taken without much investment or effort. Download creative apps and get started right now.
Tayasui Sketches. One of the most beautiful and simple applications with numerous tools will teach you how to draw in different techniques.
Bamboo Paper. Wacom, a company that creates drawing tablets, has developed its own application for artists. Sketches, sketches and full-fledged drawings - this program will be needed at every stage of learning.
Zen Brush. This application will not help with learning, but it will put you in the right creative mood. With a brush you can draw characteristic strokes, and the finished drawing looks like a work of art from some distant eastern country.
We’ve sorted out the materials, the sources of inspiration, too, the books have been studied, and there are applications for the laziest. It's your turn - it's time to get down to business.
The main thing is to find what you really like. Go for it!
Anna Rastorgueva, illustrator, teacher
In childhood, a child does not think about why and what to draw. While drawing, he reworks his life experience, transferring it to paper, and thereby comprehends it and develops.
As you get older, it becomes more and more difficult to find ideas... We get distracted by everyday affairs, we stop hearing ourselves, our inner world. It is especially difficult at the beginning, when you are just embarking on the path of discovering yourself as an artist.
To draw well, you need to draw every day. But where do you get the inspiration for this?
Here are some ideas for you: how and what to draw every day.
What to draw? 11 ideas for daily drawing.
1. Go through the archives of your drawings and sketches.
The simplest thing is to open a folder with your old drawings and look at them.
What is unfinished about them? Where did the hitch occur? 
Look at the drawing with fresh eyes. Think how to modify or rewrite it.
In addition, immersing yourself in past drawings will immerse you in the emotions that you previously experienced. This may reinvigorate your creative muse. Maybe based on an old idea a new one will arise... And then another picture will be born.

2. Draw something from life.
Take a look around the house: walls, furniture, interior items, potted plants, souvenirs brought from trips that keep your memories. What caught your eye? 
Draw one object. You can add other objects to it and draw the background.
As a result, your drawing can turn out to be very atmospheric, keeping the warmth of the house, your thoughts and memories

I suggest watching a recording of my speech on Periscope on the topic of quick sketches from nature. I hope you find this video helpful.
Sketch of a plant from life
3. Draw an abstract combination of spots.
Unleash your imagination, imagine yourself as a creator and get the most out of the play of color, how the paint flows and mixes, what new shapes and shades you observe. Cast aside doubts and fears. Create! This is great color therapy.
Depict your day, your mood, and capture it in color.

4. Create a hand-drawn recipe.
The process of cooking itself can be very creative. And if you also transfer it to paper... Write down your culinary ideas, make them beautiful pictures, create your unique recipe books. In the future, this will inspire you to continue to create in cooking and drawing.

Don't know how to draw recipes? Watch this video:
Recipe drawing: charlotte with apples!
![]() More interesting and useful information about drawing
More interesting and useful information about drawing
from the artist Marina Trushnikova
You will find in electronic magazine“Life in Art.”
Receive magazine issues to your e-mail!
5. Draw a sweet little something for your friends or family.
This could be a postcard for a holiday - for a birthday, for the New Year, for March 8 or Valentine's Day. Or just a cute impromptu for no reason... 
Receiving a handmade card in the age of email is unusual. Such gestures are always very pleasant.
The emotions of gratitude received in return will certainly give you inspiration to continue the creative process.

6. Practice quick sketches.
Draw people and animals using sketchy human and animal anatomical figures.
To complicate the task, use a timer, setting yourself the time for this work in seconds.

In the future, the ability to quickly draw a human figure will inspire you to make quick sketches.
Watching and noticing interesting stories, types and characters, you will be able to draw, snatching scenes from life: on the street, in the theater, in a cafe, at work.
This will allow you to develop yourself, your worldview and the inner feeling of an artist.
Seconds timer:
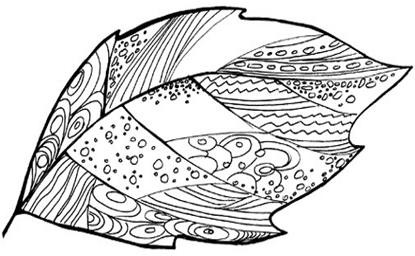
7. Practice creating monotypes.
Learn to create monotypes. This will allow you to create without initially thinking about the plot. Monotype will do this for you.
Use your imagination! Experiment! A monotype print will give you many opportunities for spontaneous solutions. Examine the image in the spots and streaks that have appeared. And draw in the spots a little to help the viewer see this image.

 Start painting with watercolors today!
Master the basics of watercolor painting with this popular course
“Taming Watercolor”
8. Draw a graphic design.
Love to draw with a simple pencil or in black and white?
Then try your hand at graphics! This can be drawing a spot with further drawing of details with a pencil, gel pen, ink or marker.
Or maybe you will first make some kind of drawing graphically, and then complement it with a background, add volume to the details, fill it, fill it fancy patterns, lines and scatter splash spots.
Practice making doodles!
9. Draw in a travel sketchbook.
Going on a trip? Bring a small sketchbook with you! 
A notebook filled with impressions and drawings (as well as booklets, tickets, receipts, napkins... and other “tourist trash”) will become no less valuable a memory than an album with photographs.

 IF YOU WANT TO:
- learn to quickly record your thoughts and impressions
- remove the fear of drawing in public
- bring back beautiful travel books from travels
then my sketchbooking workshop
will become an invaluable assistant for you in this!
10. Browse the websites of your favorite artists.
Look at their paintings, find something that catches you and touches your soul. Compare different techniques, try to imagine how this or that picture was painted, what the artist felt, what he wanted to say, how he saw the world while working. 
Look at your favorite painting by your favorite artist and try something like this. Or just copy a piece of the painting to study the technique, repeat it as you understand.
Since you got here, it means you at least believe a little that you can learn to draw. And indeed it is! Even if you have drawn just a little, haven’t drawn at all, or doubt your abilities, find a simple pencil and 20 minutes a day- and in a month you will learn how to create amazing images.
The hardest thing is to start
To learn how to draw, a person first needs to just start. You need to encourage him to pick up a pencil and start drawing lines on a blank sheet of paper. Many people believe that Blank sheet paper is a problem that can only be dealt with talented artist. In fact, once you master it, you'll have enough confidence to enjoy drawing.
After completing this course, in thirty days you will achieve first creative success, get an incentive for constant practice, build self-confidence and maintain a lifelong interest in drawing.
-
 April 17, 2015Why does a man dream about a snake?
 -
 April 17, 2015Custard for custard cakes: recipe
 -
 April 17, 2015Why do you dream about a black panther?
 -
 April 17, 2015Interpretation of sleep magic in dream books


